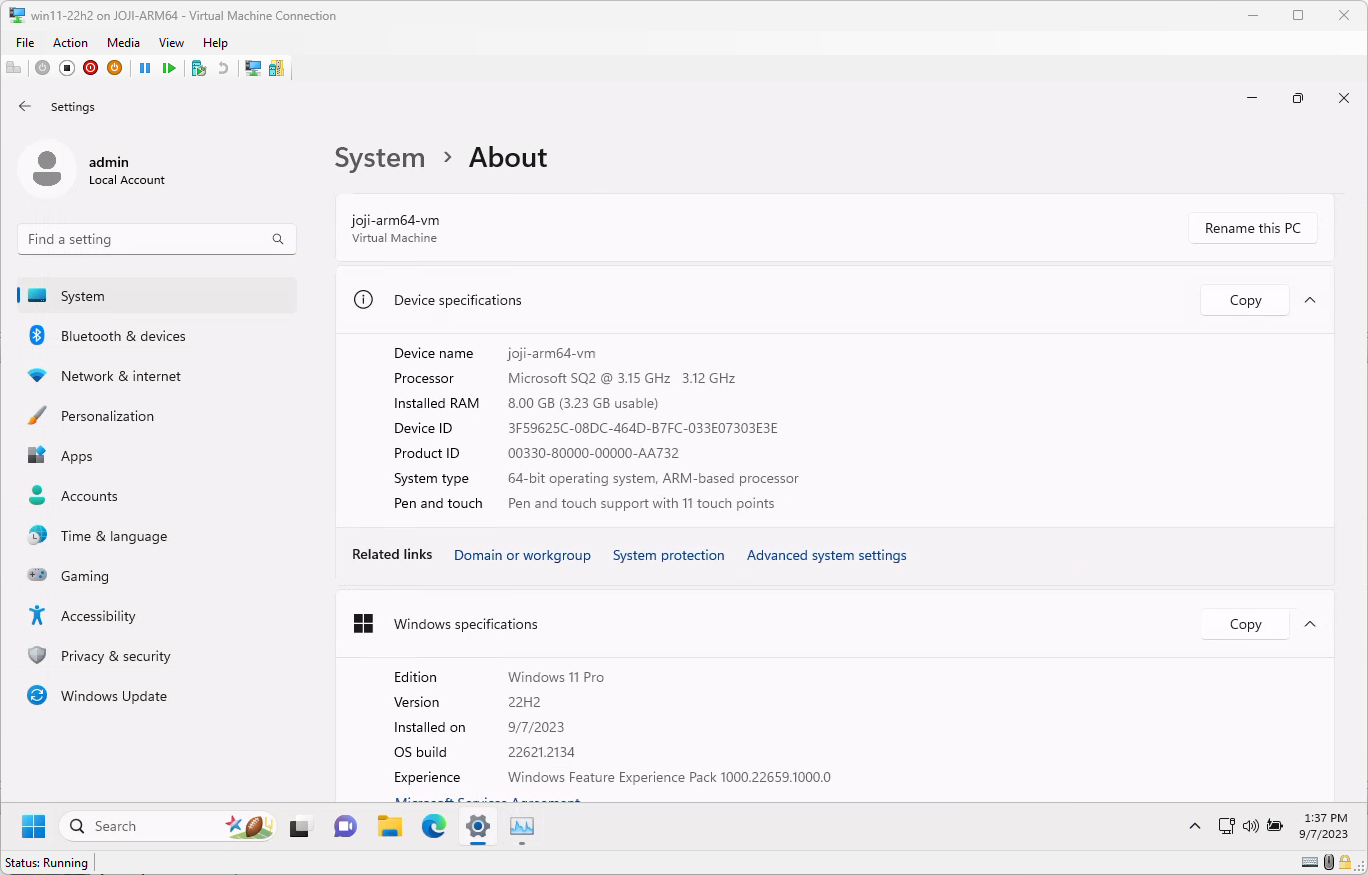
With the increasing need to support Windows 11 ARM64 cases, I've found myself needing to run this operating system in a virtual machine (VM) through Hyper-V. Although similar, installing a Windows 11 ARM64 VM isn't quite the same as installing a 64-bit Windows version. One of the main differences is that you can't directly use an ISO file for installation. Additionally, you won't be able to enable TPM on a Windows 11 ARM64 Hyper-V. This blog post aims to guide you through the steps to successfully set up your virtual machine.
Prerequisites
- You'll need to run the Windows 11 ARM64 VM on a host machine that is also running Windows 11 ARM64.
Obtaining the Windows 11 ARM64 ISO File
Browse to UUP Dump and search for
Windows 11 22H2. Choose theARM64version and your preferred edition.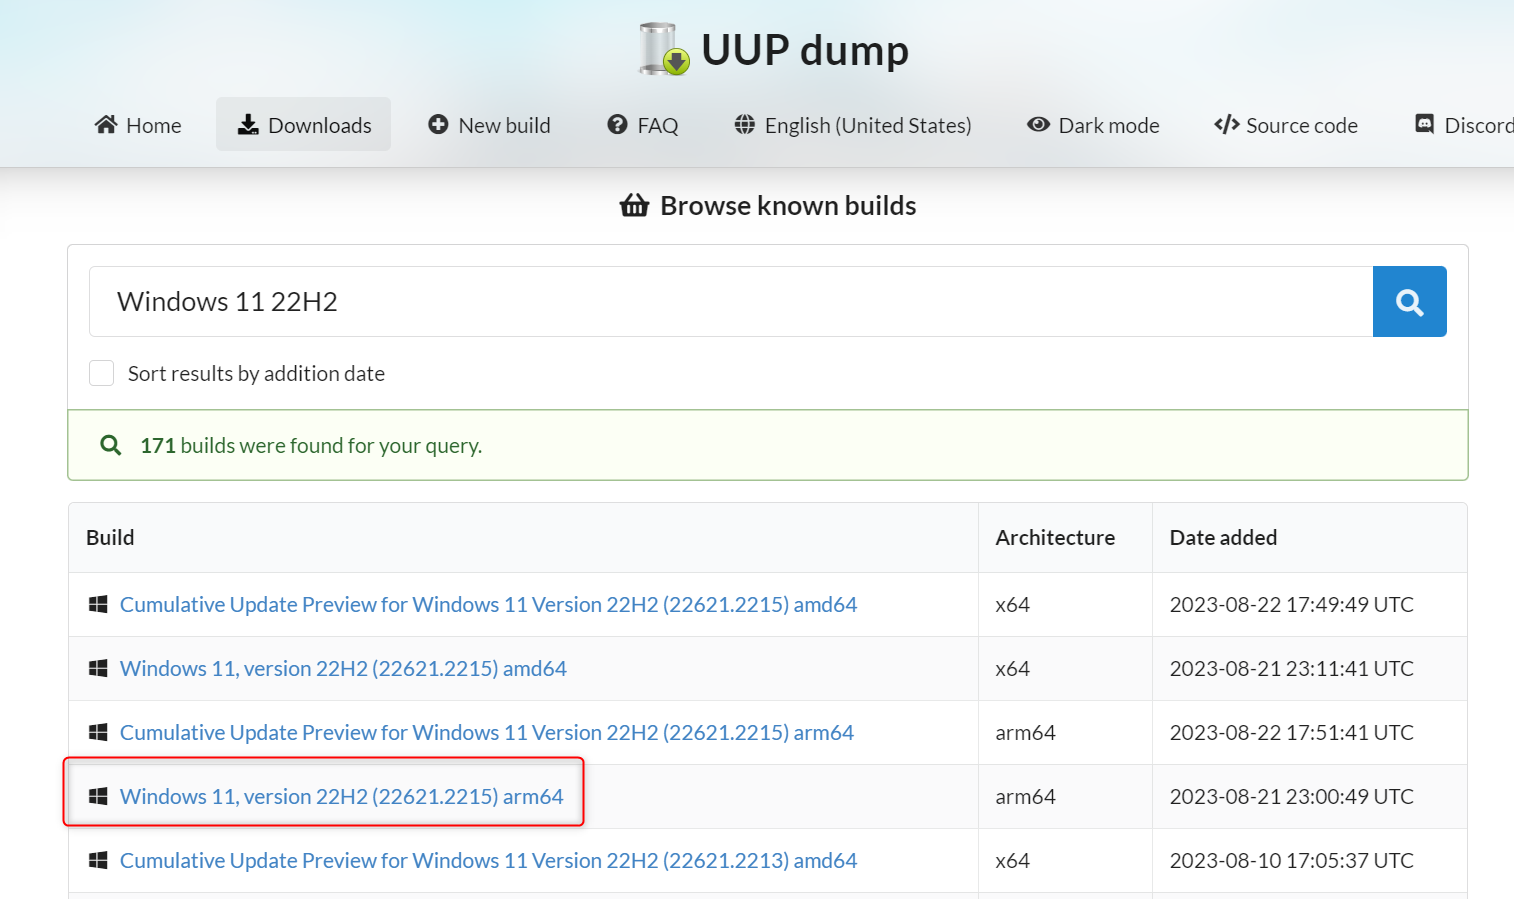
After downloading, you'll get a zip file. Unzip it and double-click
uup_download_windows.cmd. This script will automatically download and build the Windows 11 ARM64 ISO file for you. Depending on your network speed and the edition you chose, this might take anywhere from a few minutes to over an hour.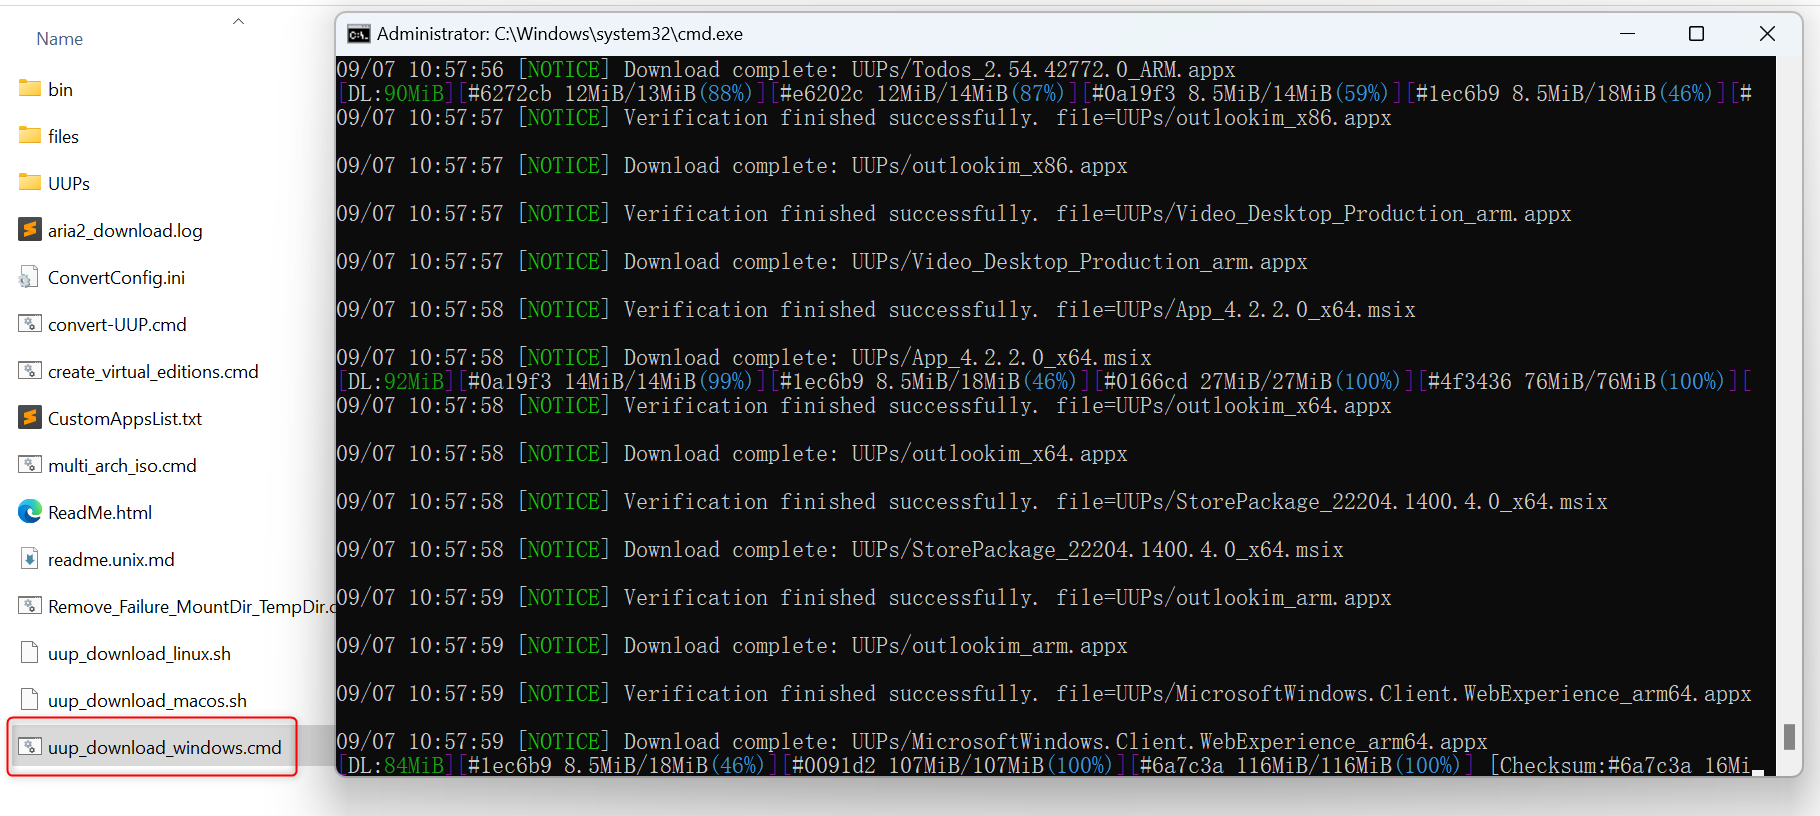
Converting the ISO to VHDX File
Mount the previously generated Windows 11 ARM64 ISO file.
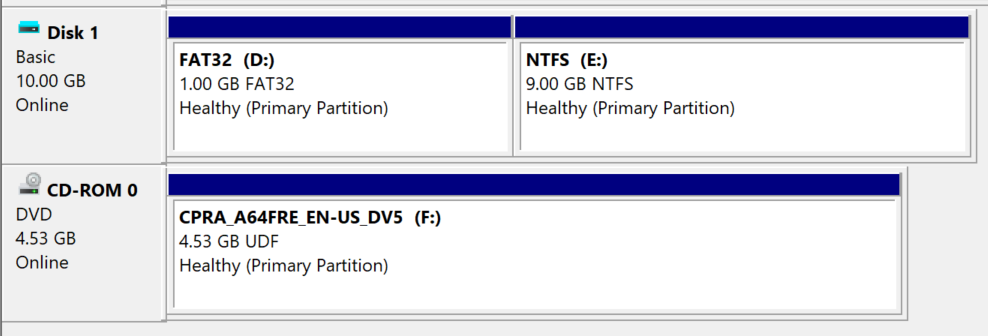
Open Hyper-V Manager and go to New -> Hard Disk to create a dynamically allocated 10GB VHDX file.
Mount the newly created VHDX file.
Open
Disk Managementby runningdiskmgmt.msc. You'll be prompted to initialize the newly mounted VHDX; select MBR as the partition style.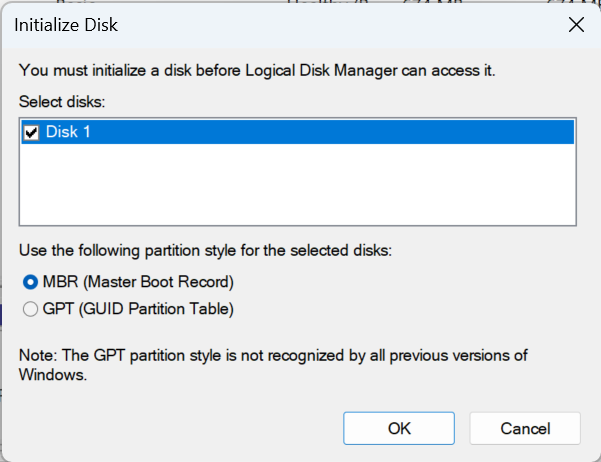
Create two partitions inside this VHDX: one with a size of 1GB (FAT32 file system, labeled as 'FAT32') and another with the remaining space (NTFS file system). Format these two partitions.
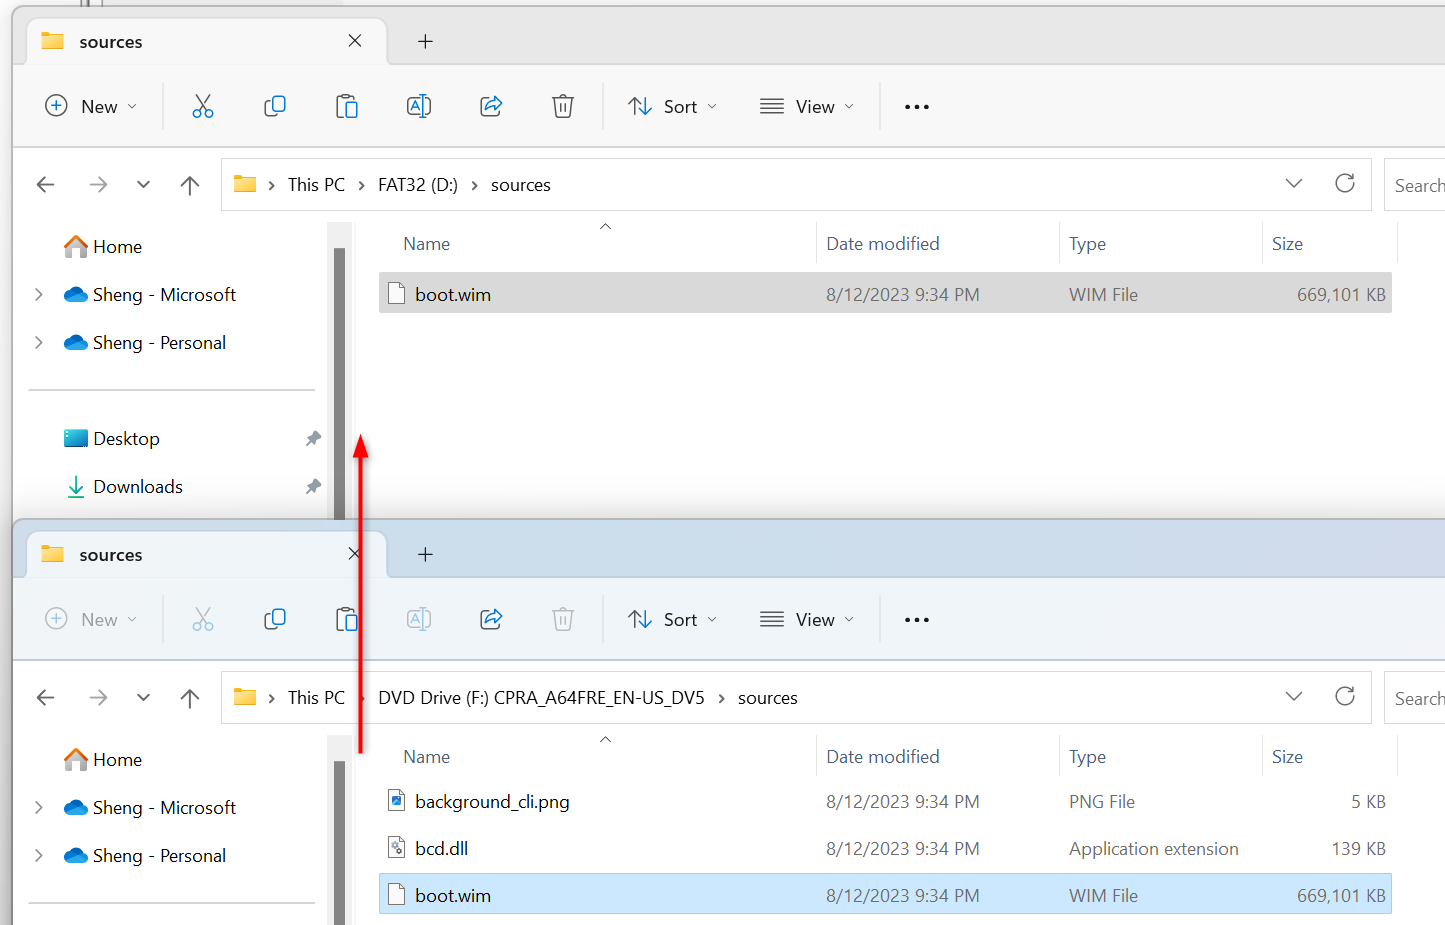
Copy all files and folders from the ISO to the FAT32 partition in the VHDX, except the
sourcesfolder. Manually create asourcesfolder in the FAT32 partition and copy theboot.wimfile from the ISO'ssourcesfolder into it.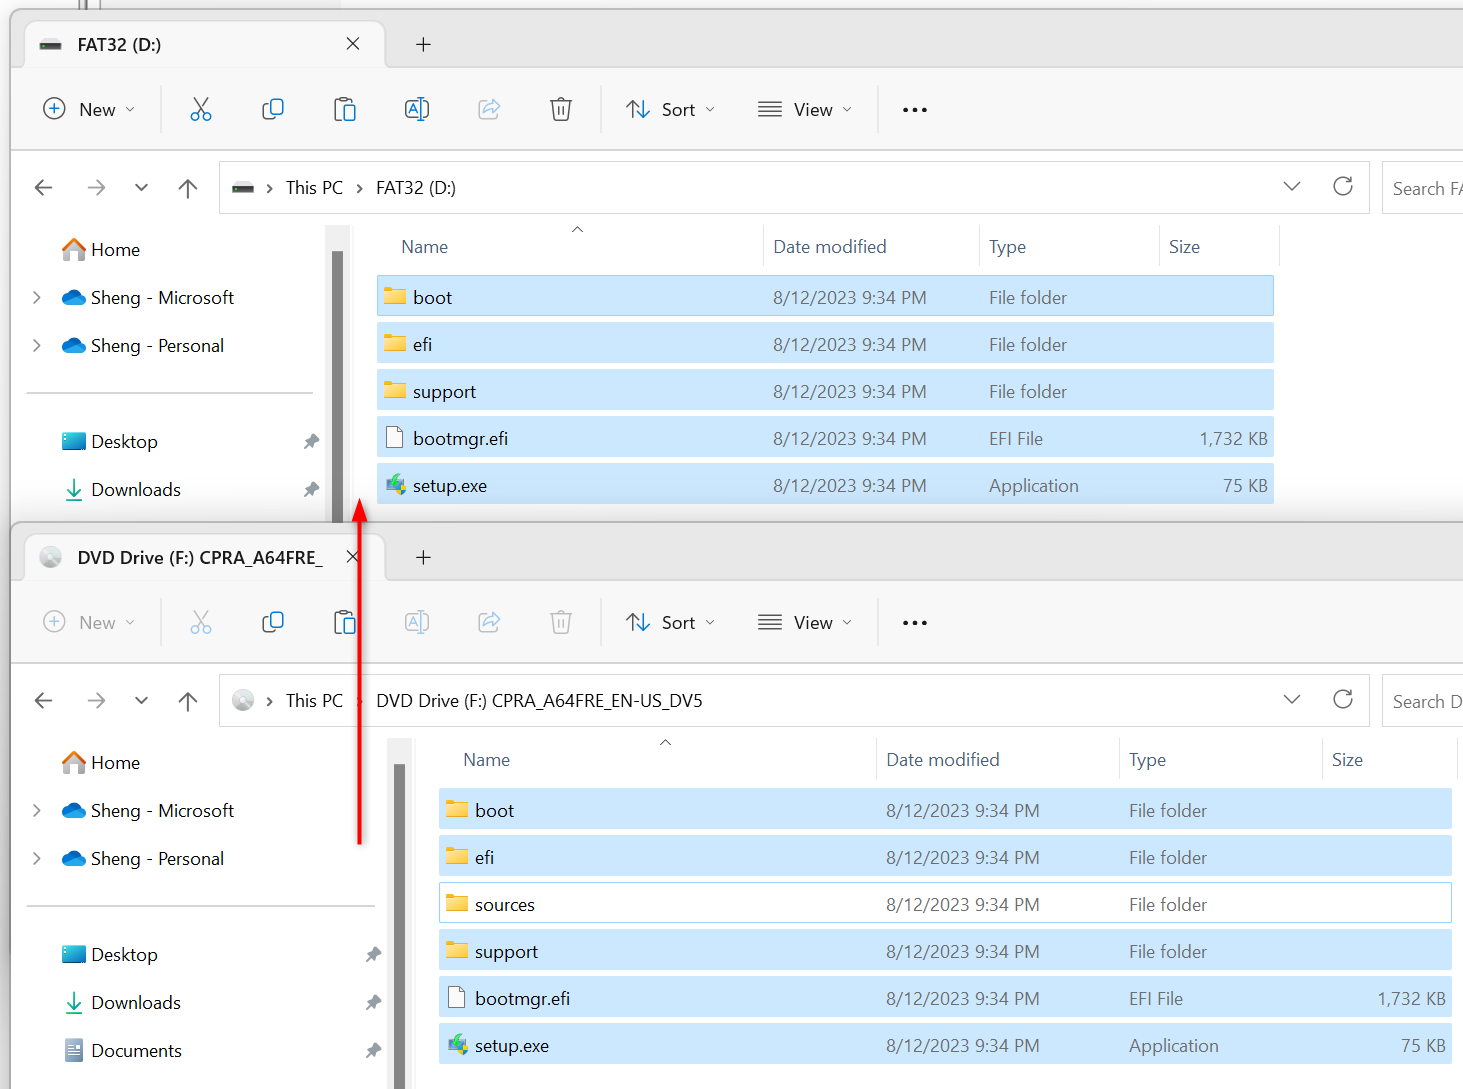
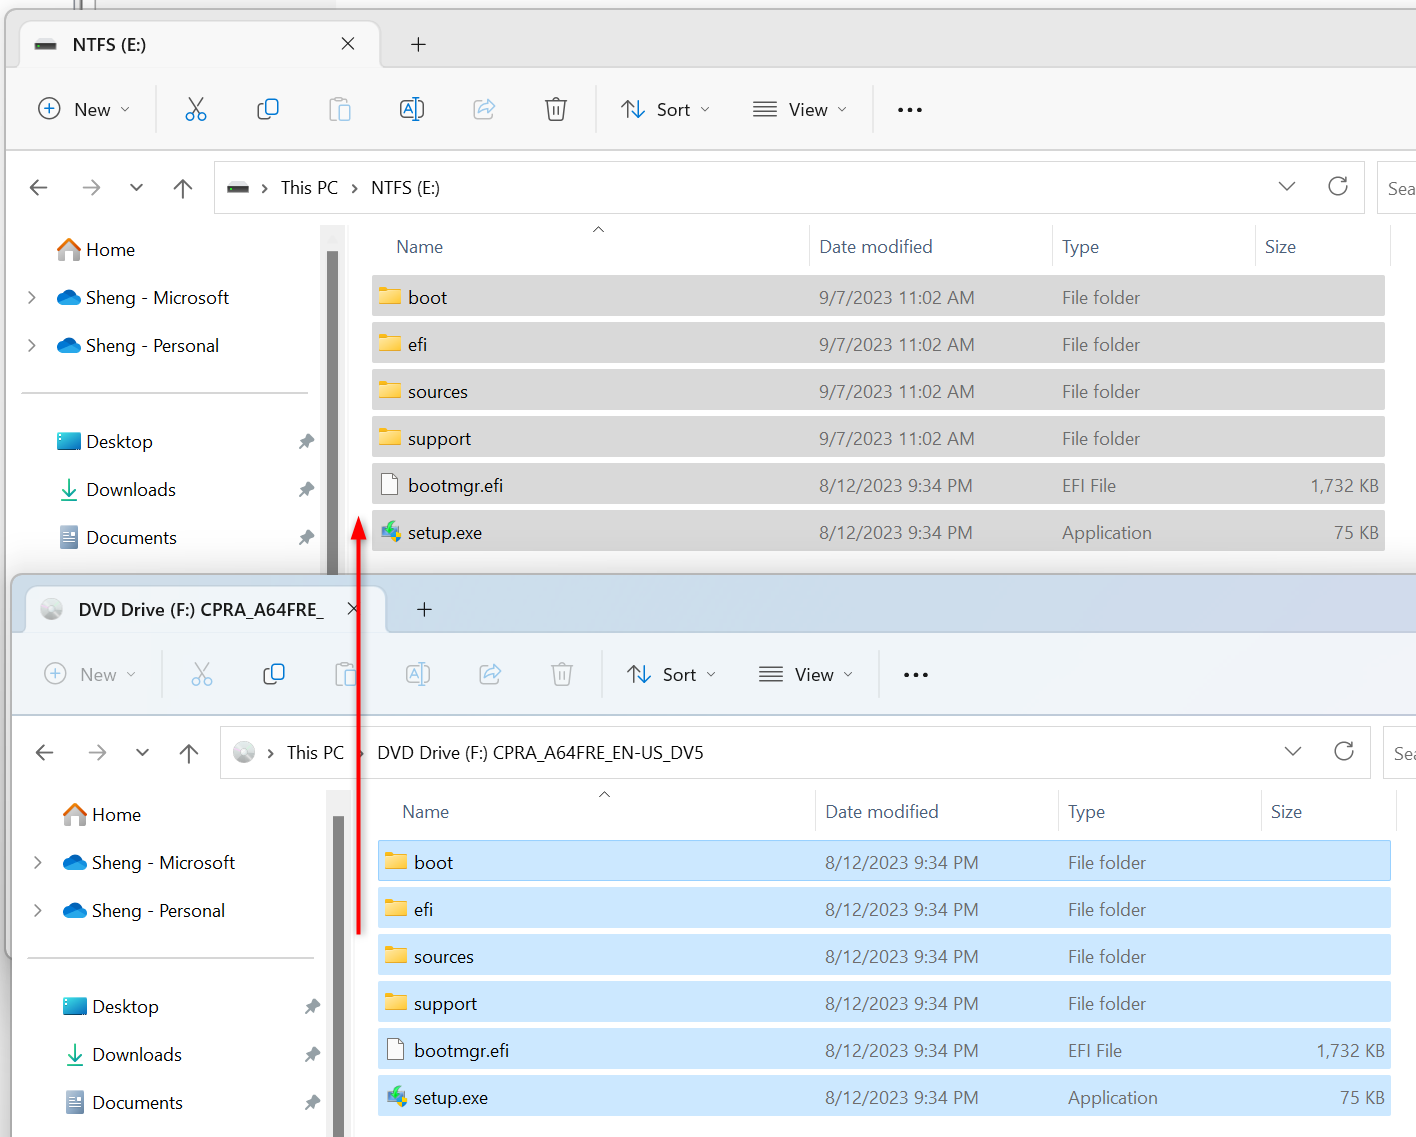
Copy all files and folders from the ISO to the NTFS partition in the VHDX.
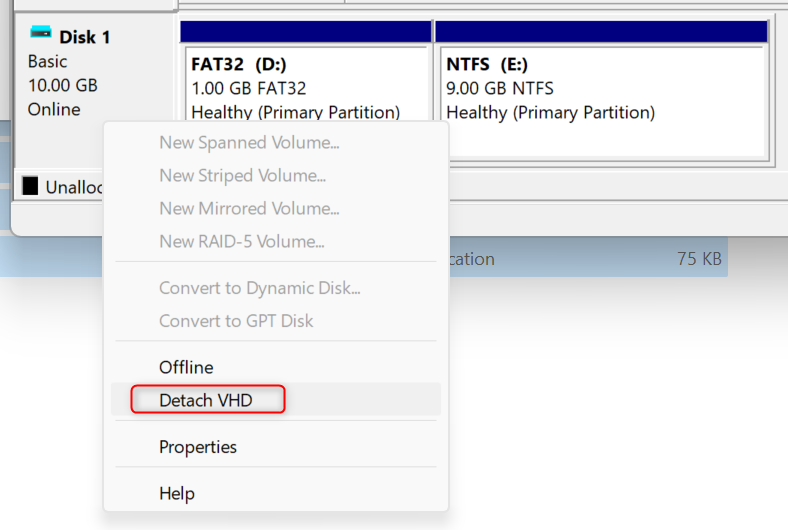
Once this is done, detach the VHDX through Disk Management.
Creating the Windows 11 ARM64 VM in Hyper-V
Open Hyper-V Manager on a machine running Windows 11 ARM64 and create a new Virtual Machine.
In addition to the default VM disk, add a new
Hard Driveunder theSCSI Controllerand connect it to the VHDX file you created earlier.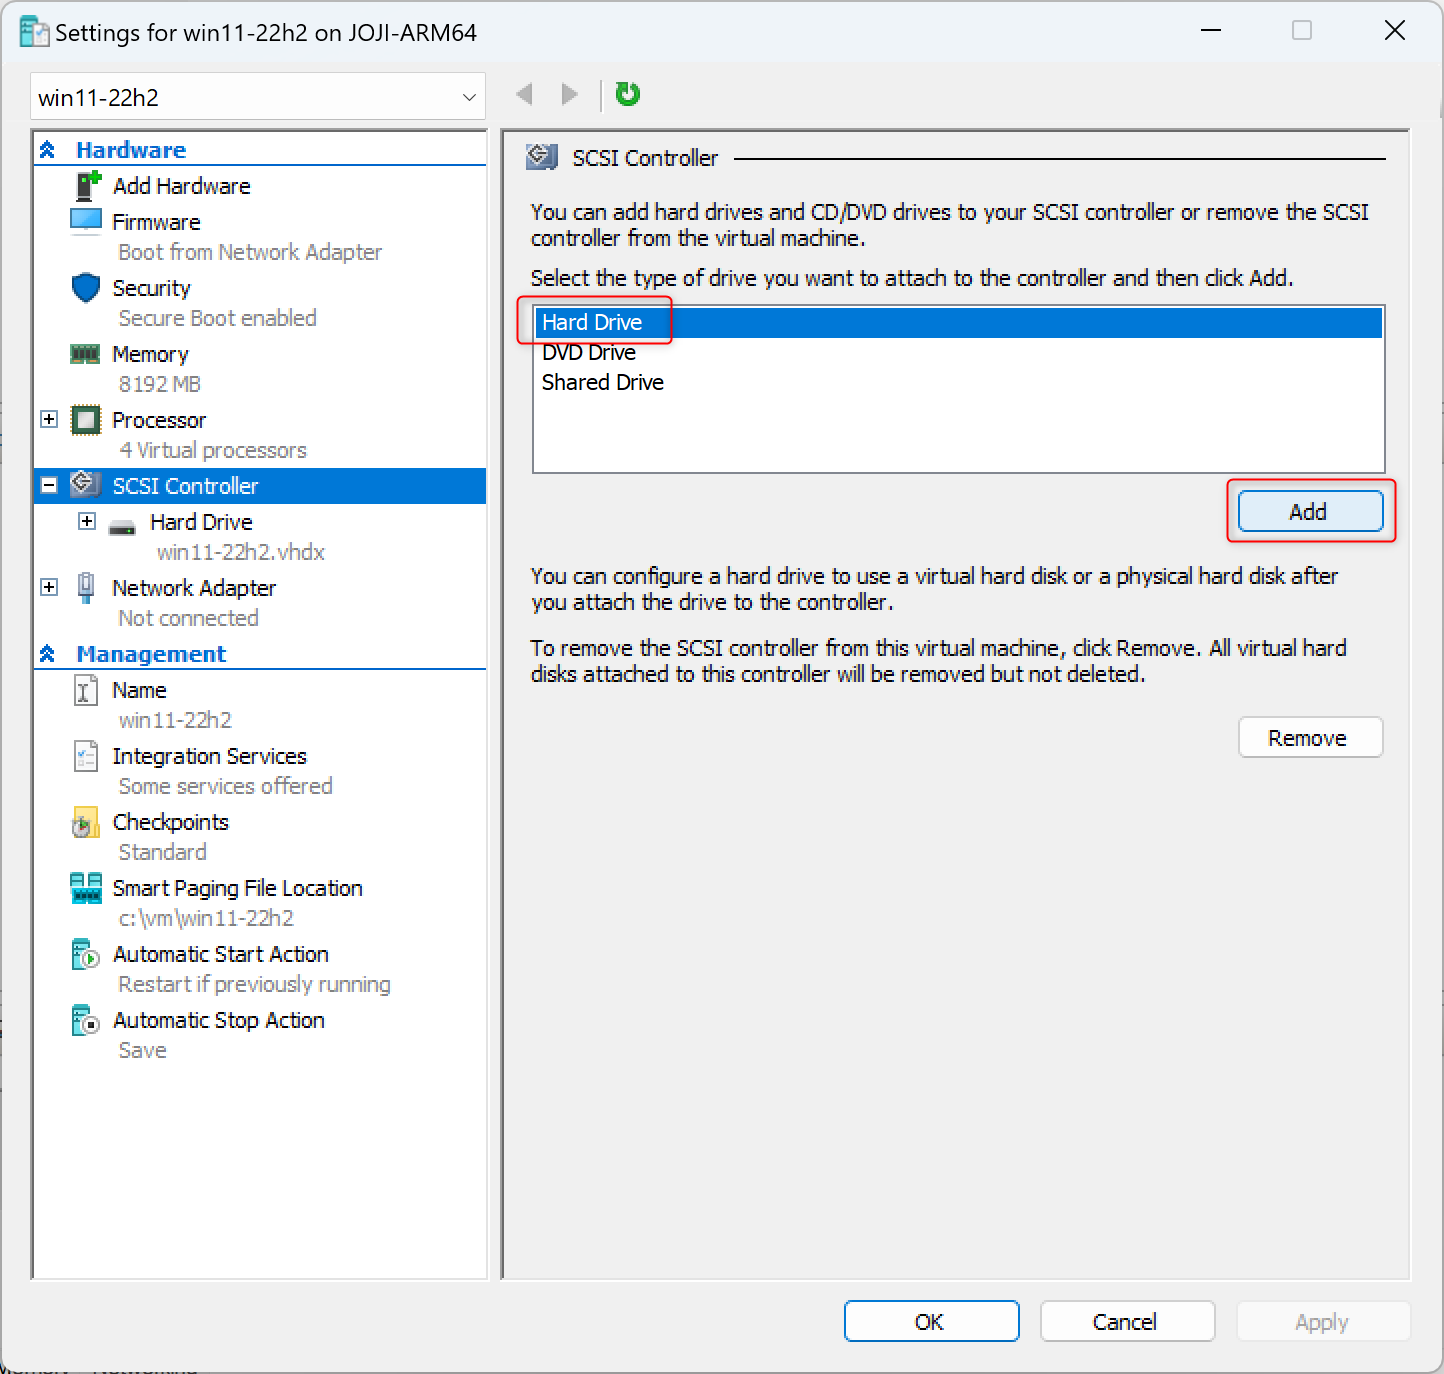
Under
Firmwaresettings, adjust theBoot Orderto place the VHDX file at the top.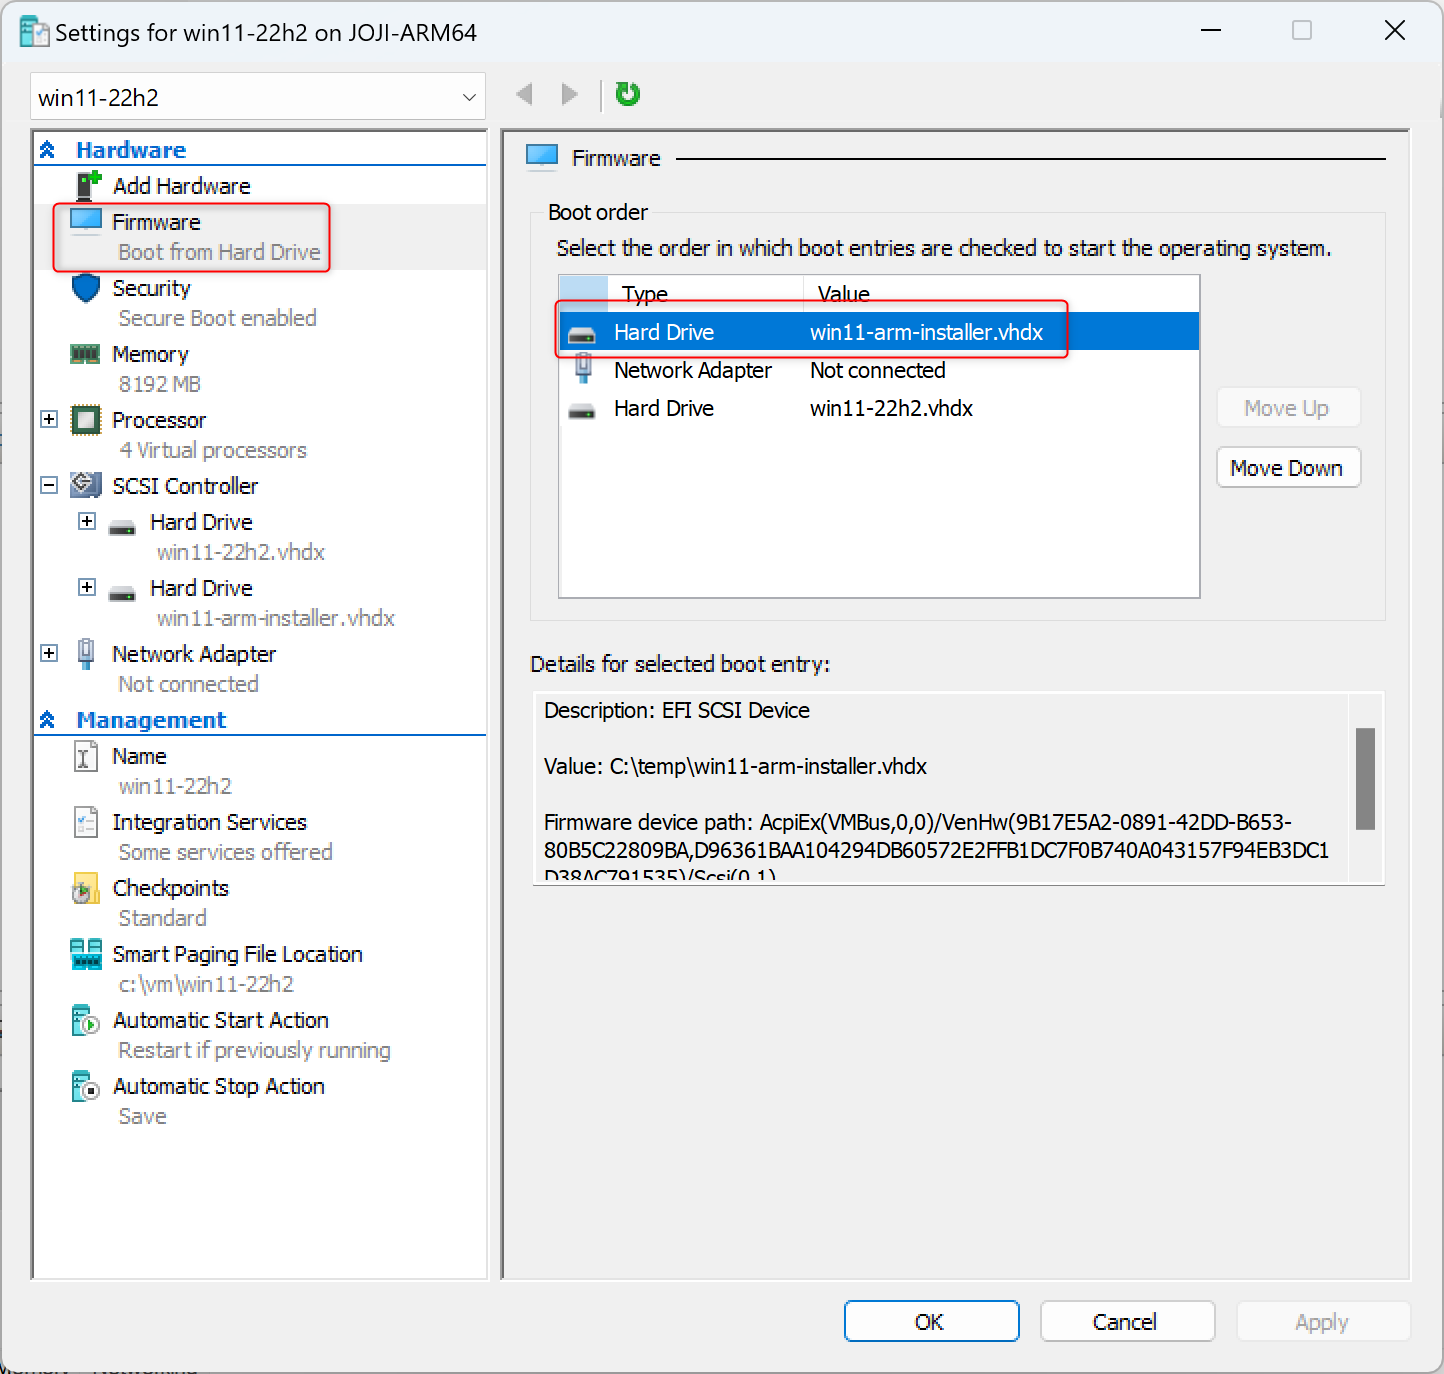
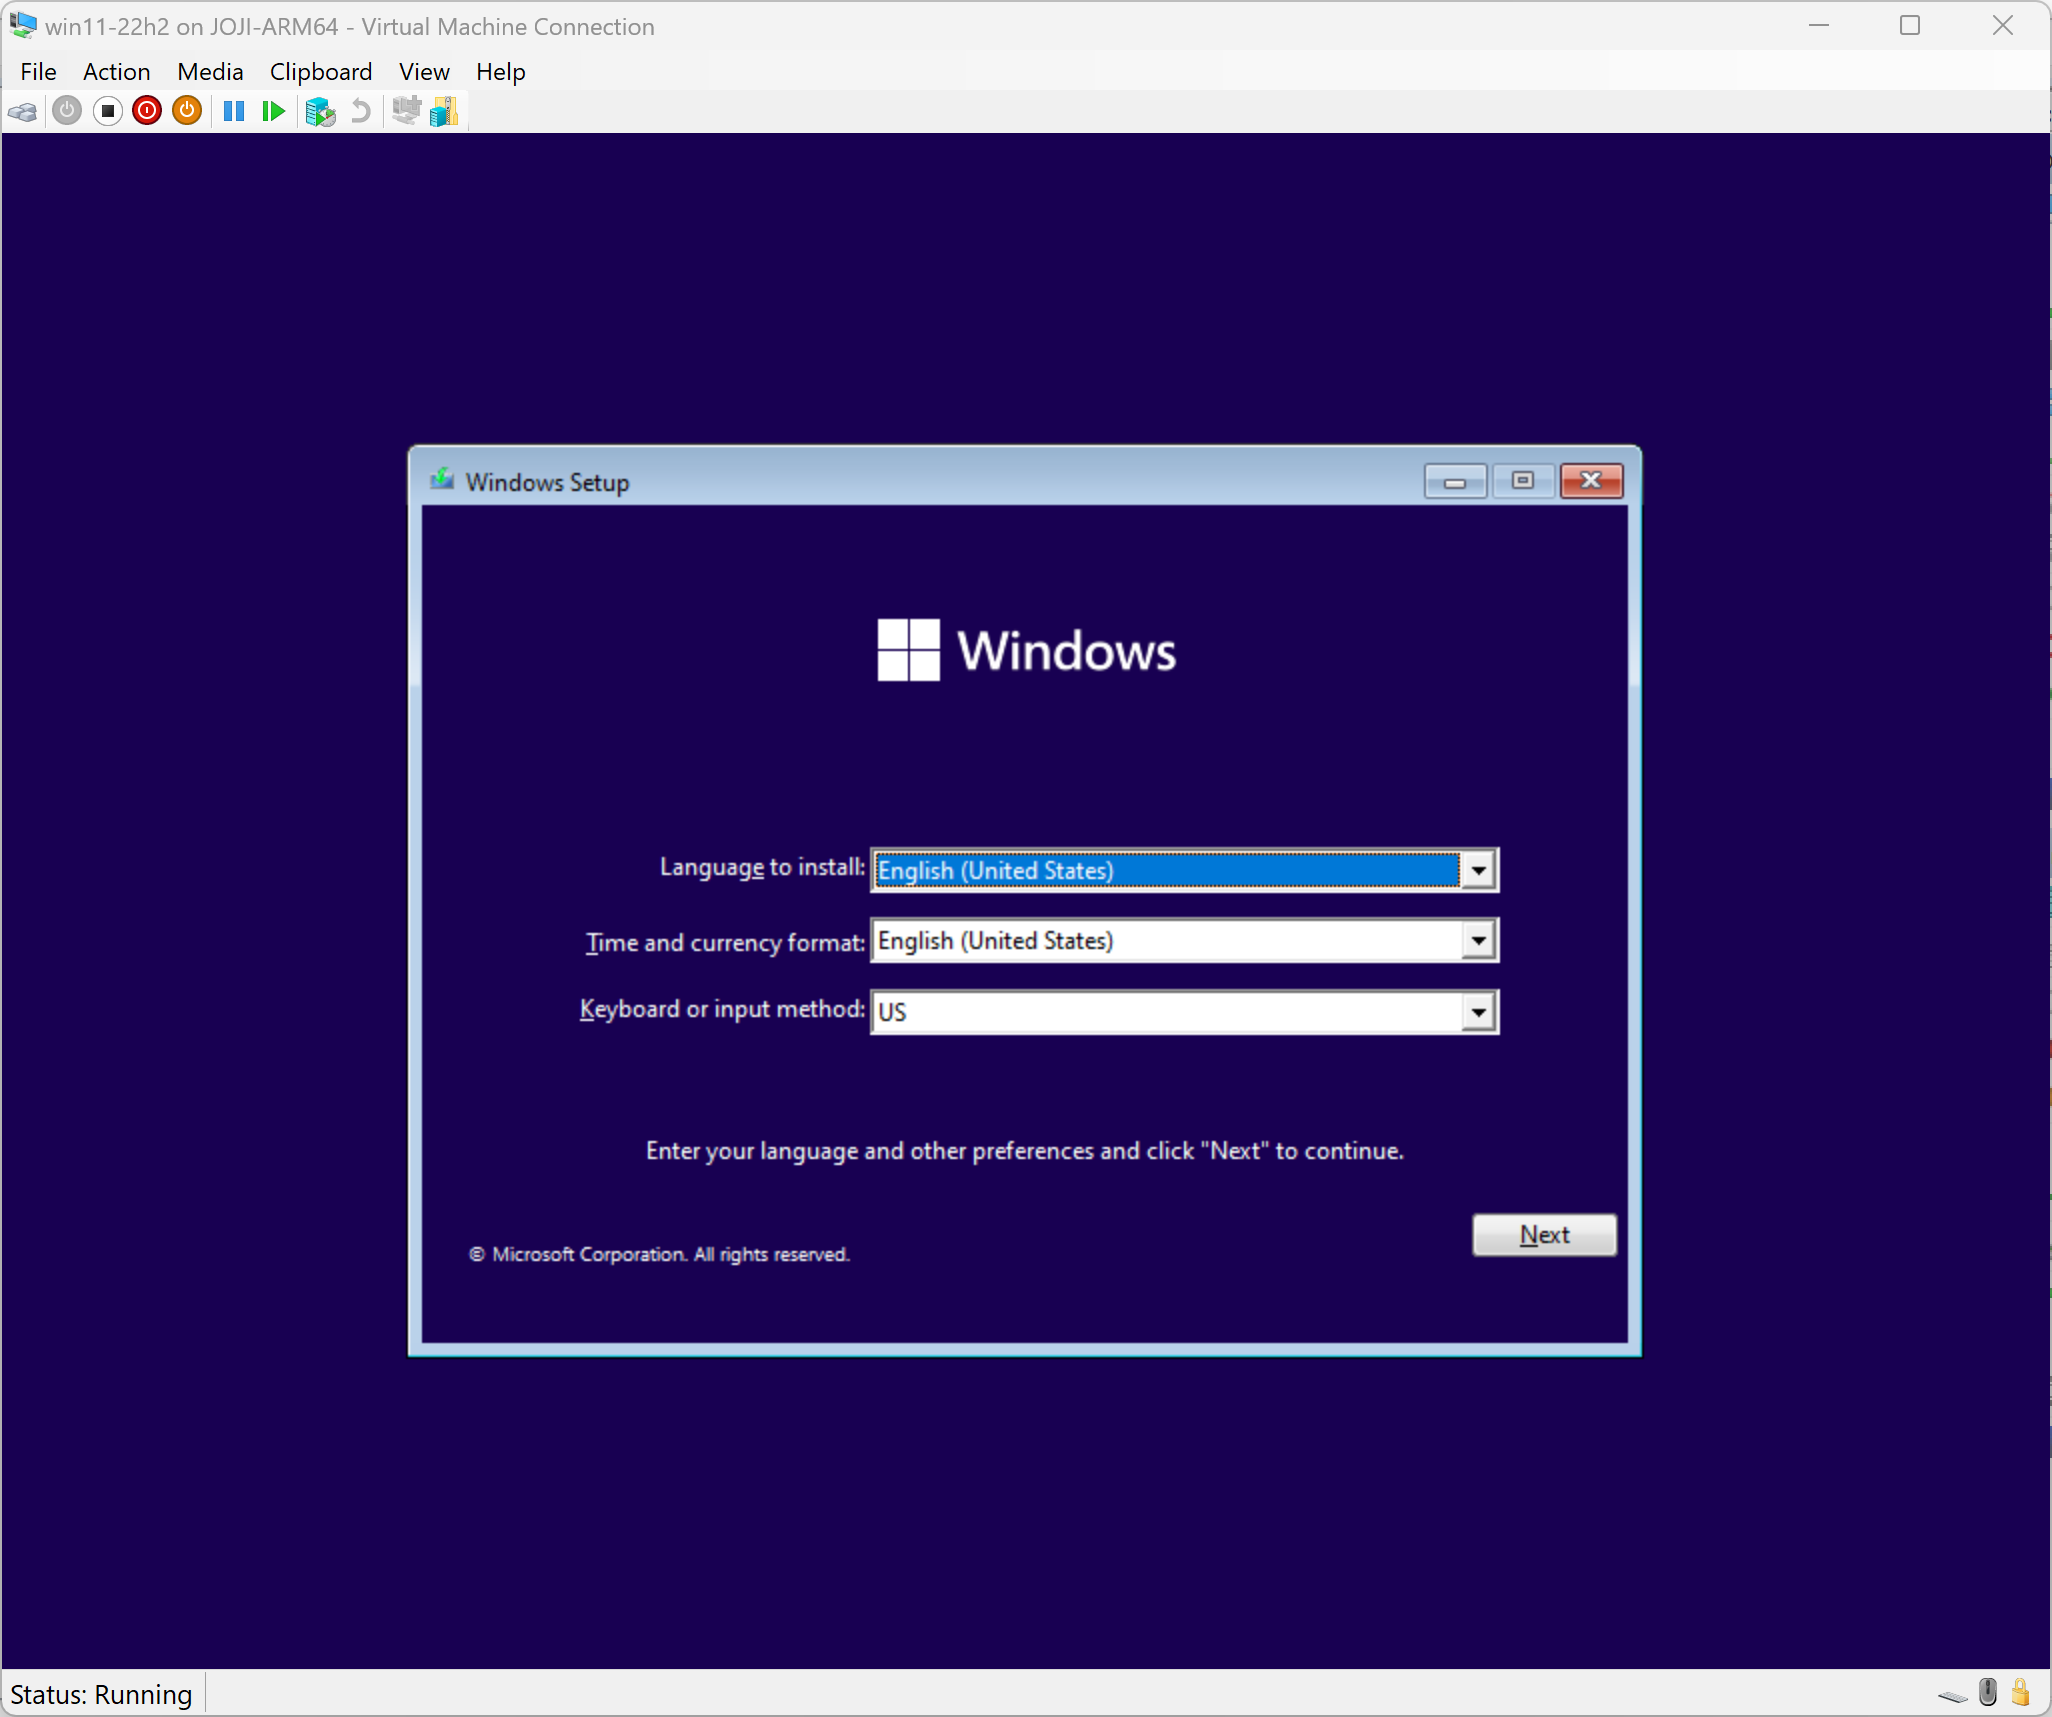
Start the VM, and you'll enter the familiar Windows 11 installation interface. TPM is currently not supported in Windows 11 ARM64 Hyper-V, if you try to enable it in VM setting, you will get error message:
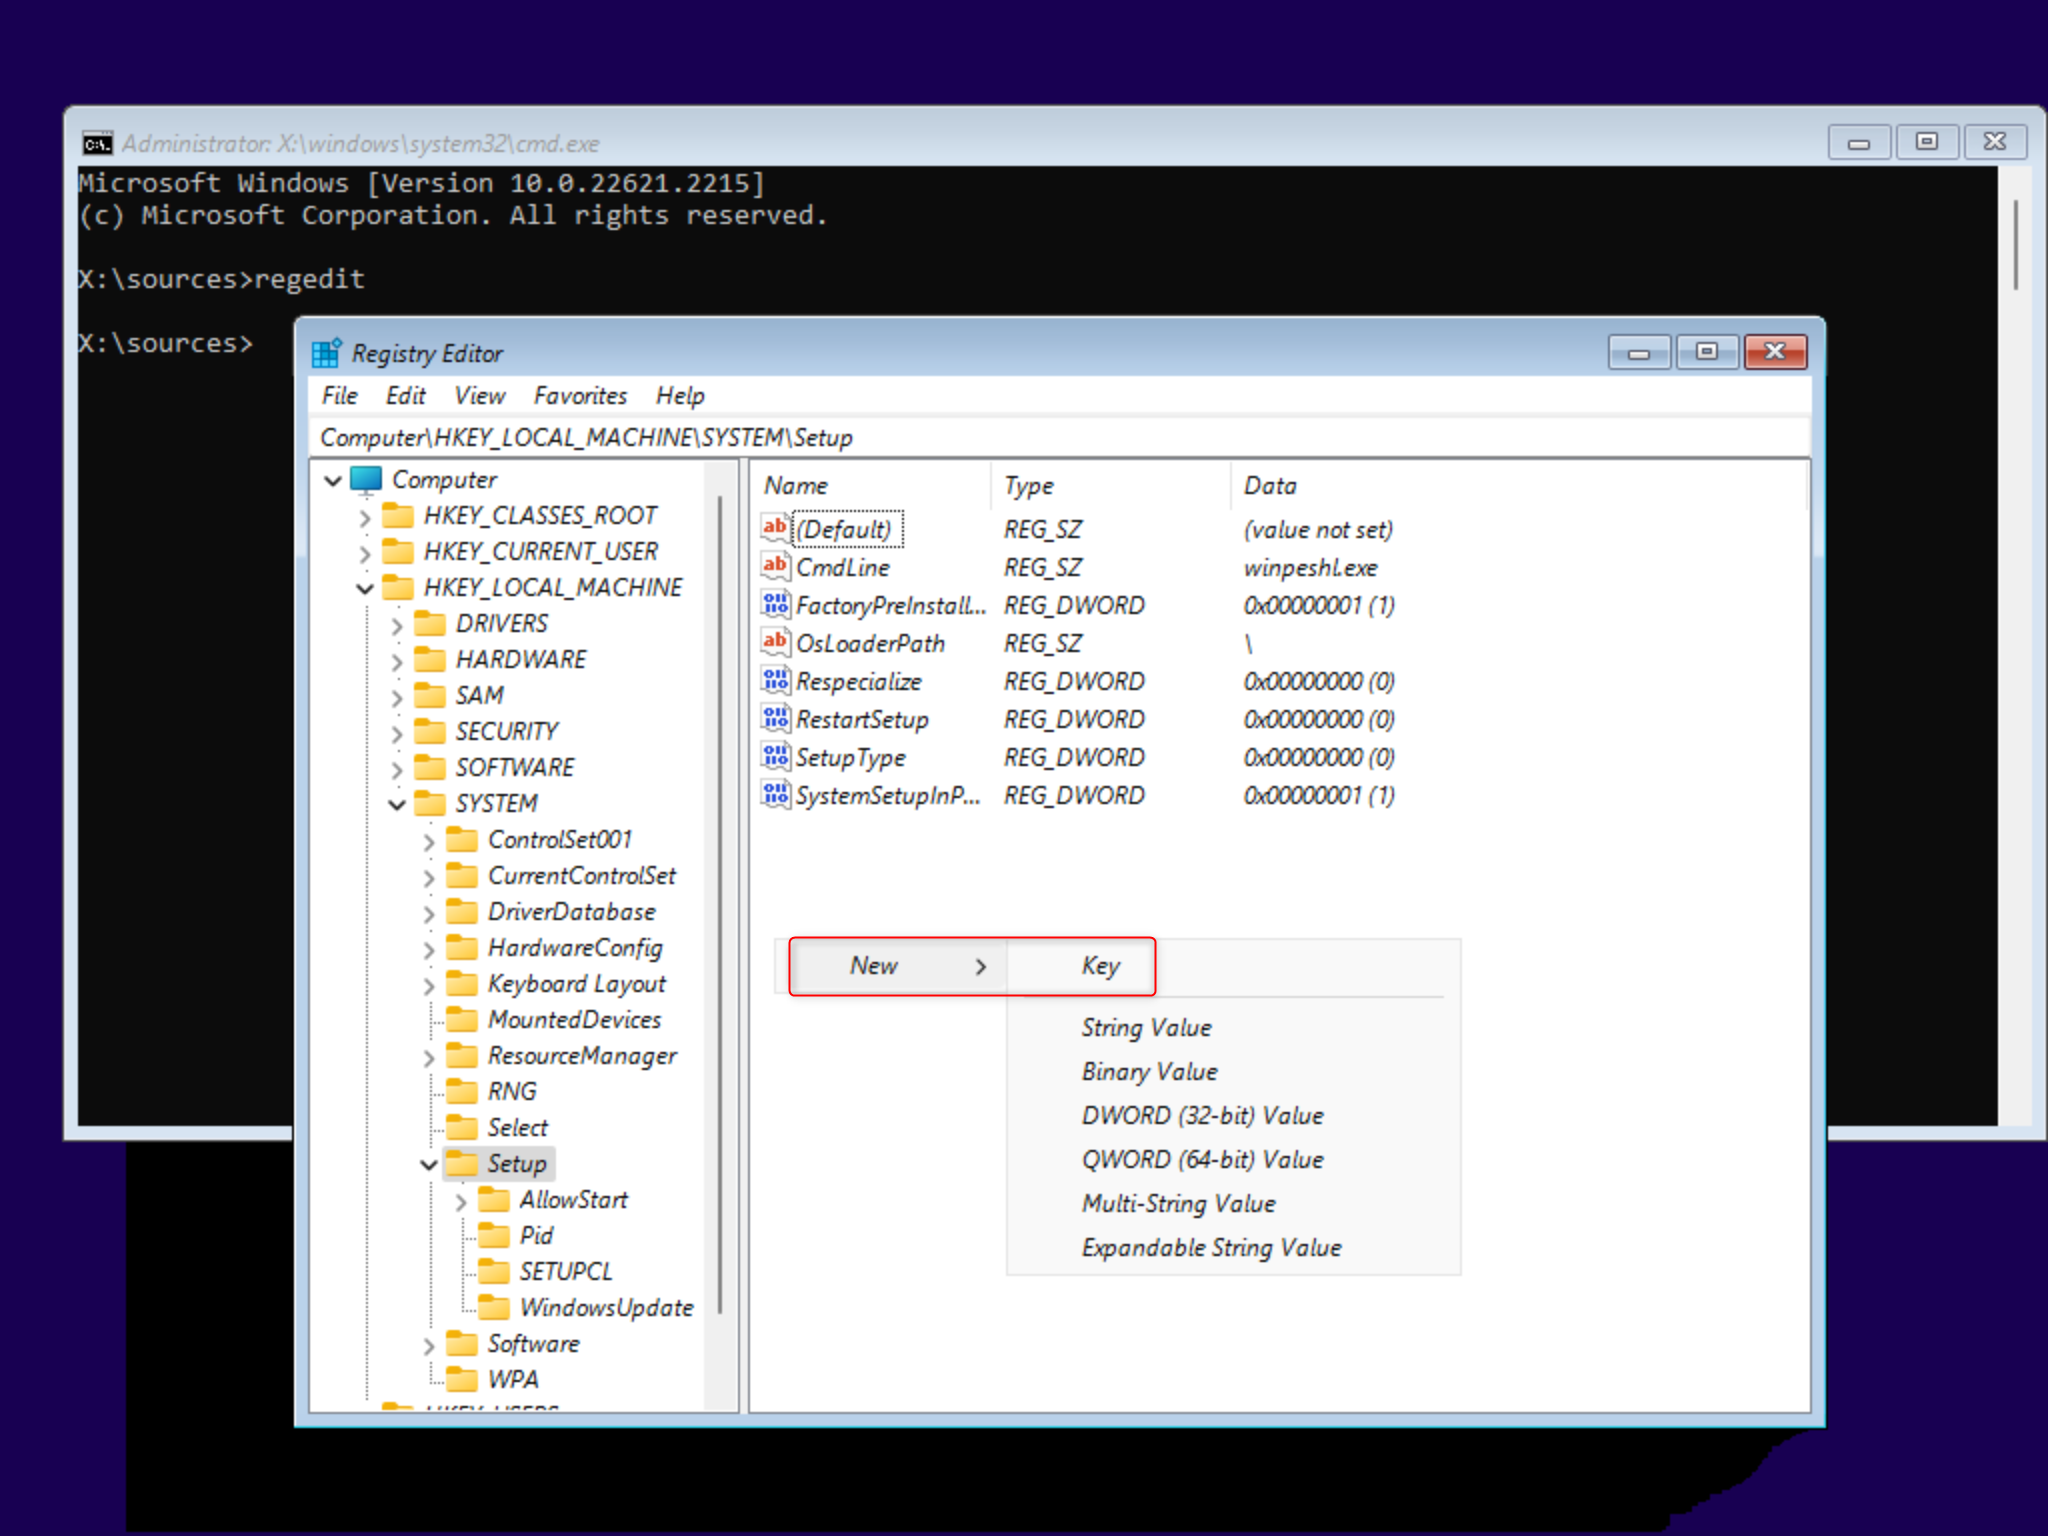
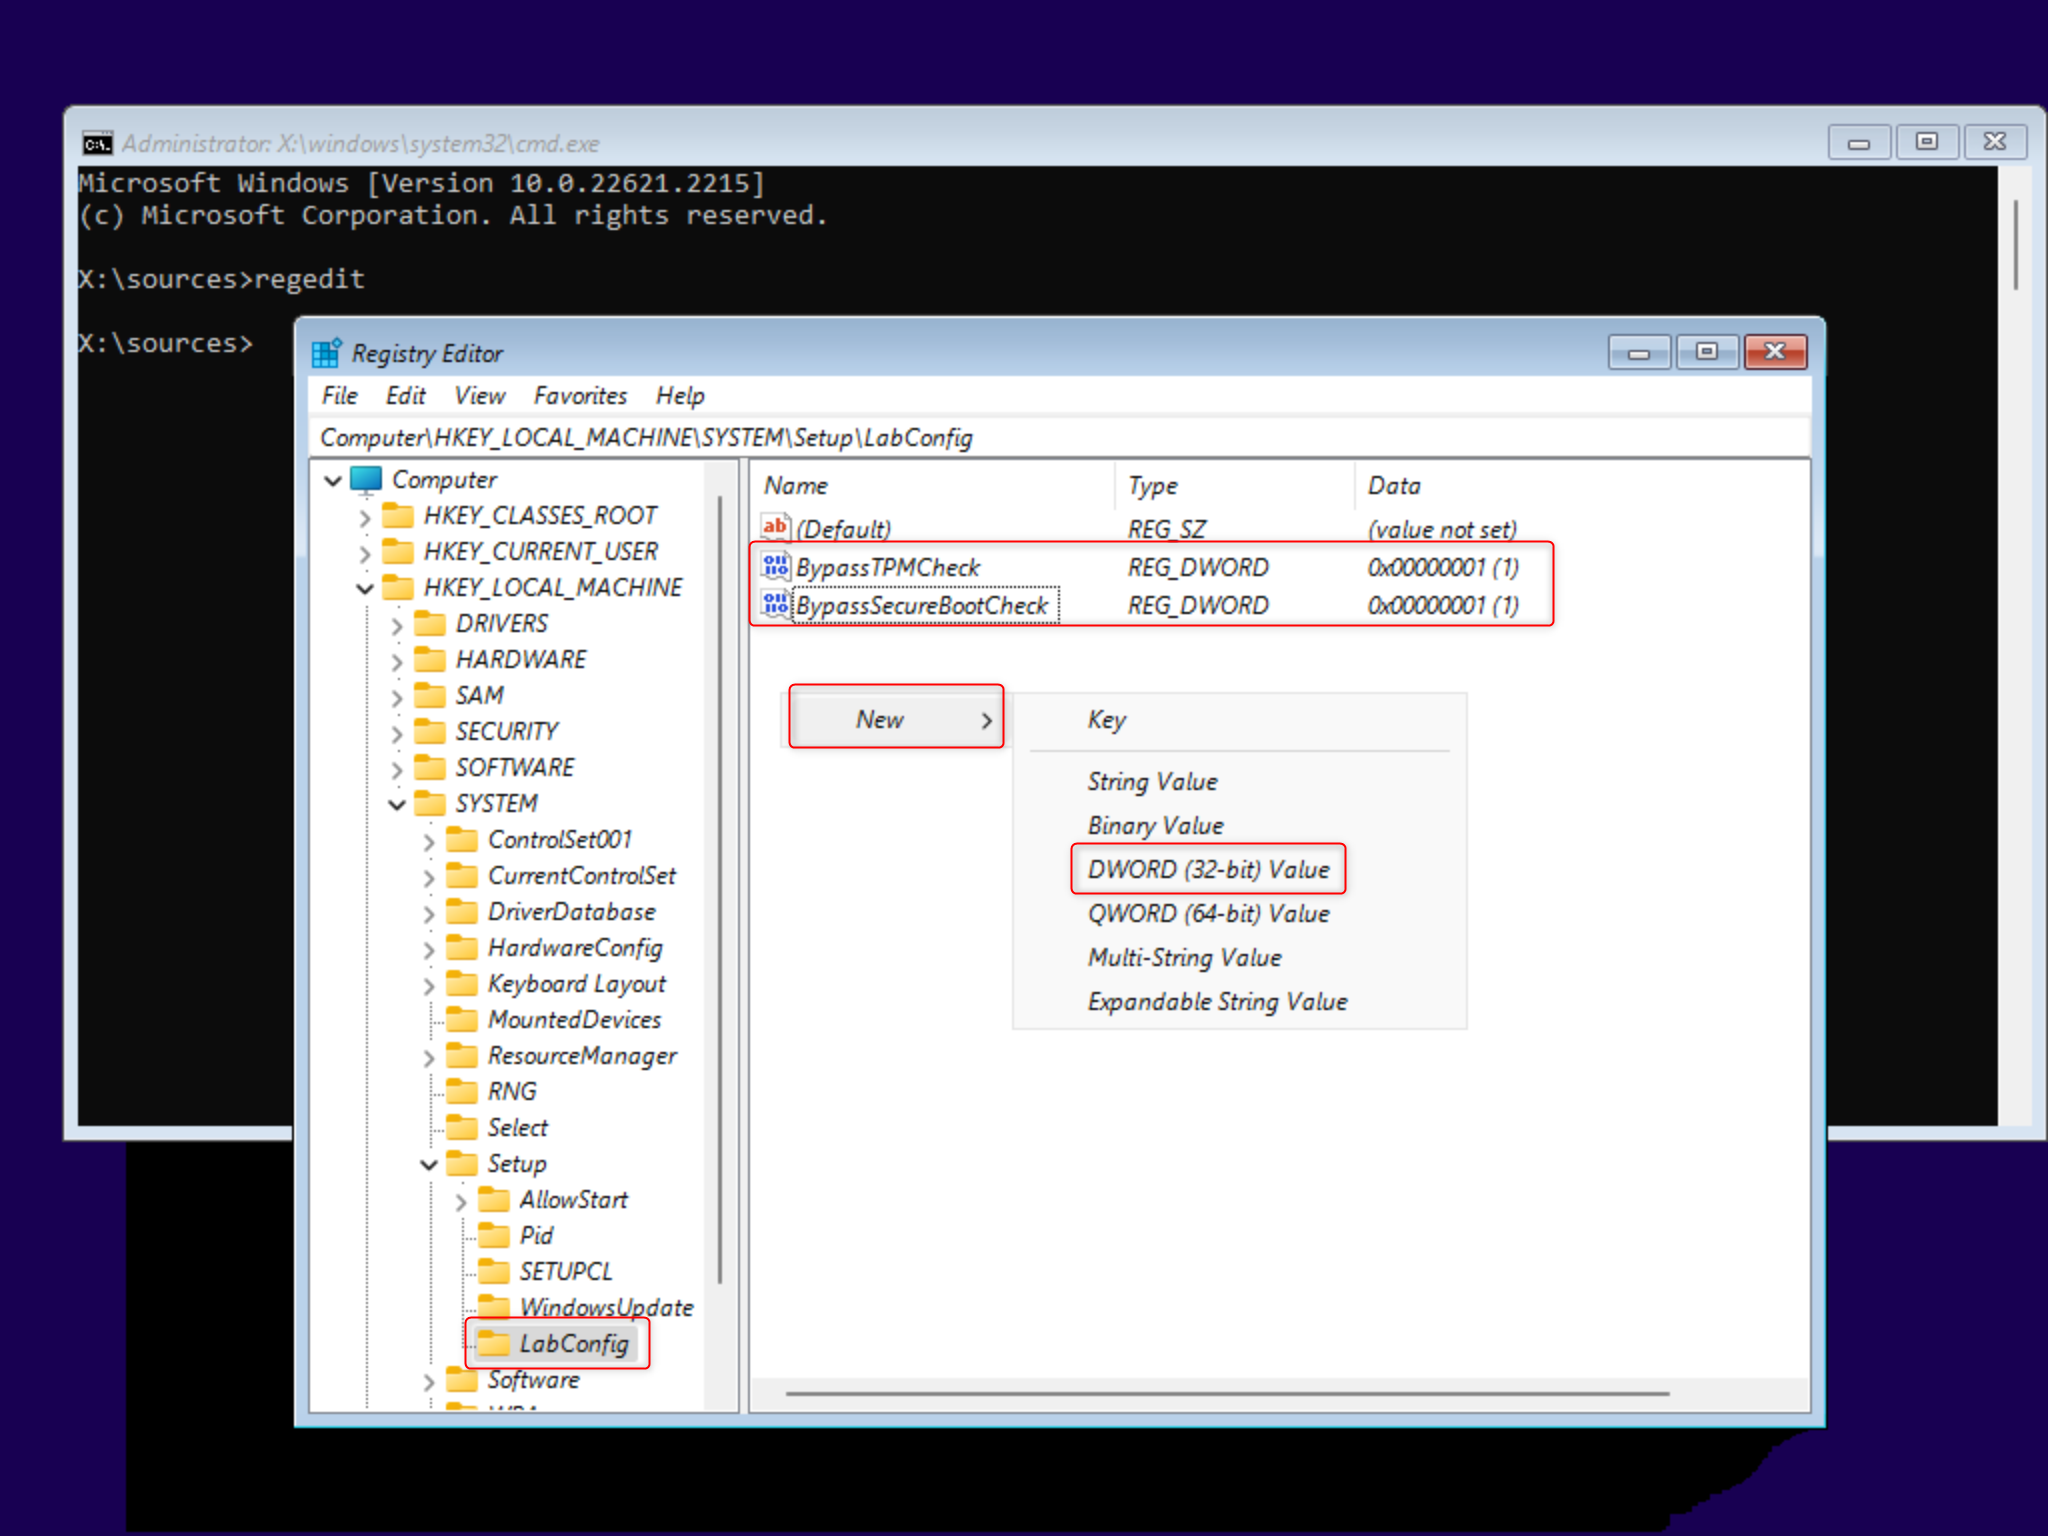
The Host Guardian Service client configuration settings could not be retrieved.you'll need to bypass it. PressSHIFT+F10to openCommand Prompt, then runregeditto openRegistry Editor. Navigate toHKLM\SYSTEM\Setup, right-click and create a new key namedLabConfig. UnderLabConfig, create two new DWORDs namedBypassTPMCheckandBypassSecureBootCheckand set their values to1. Then, closeRegistry EditorandCommand Promptto continue the installation.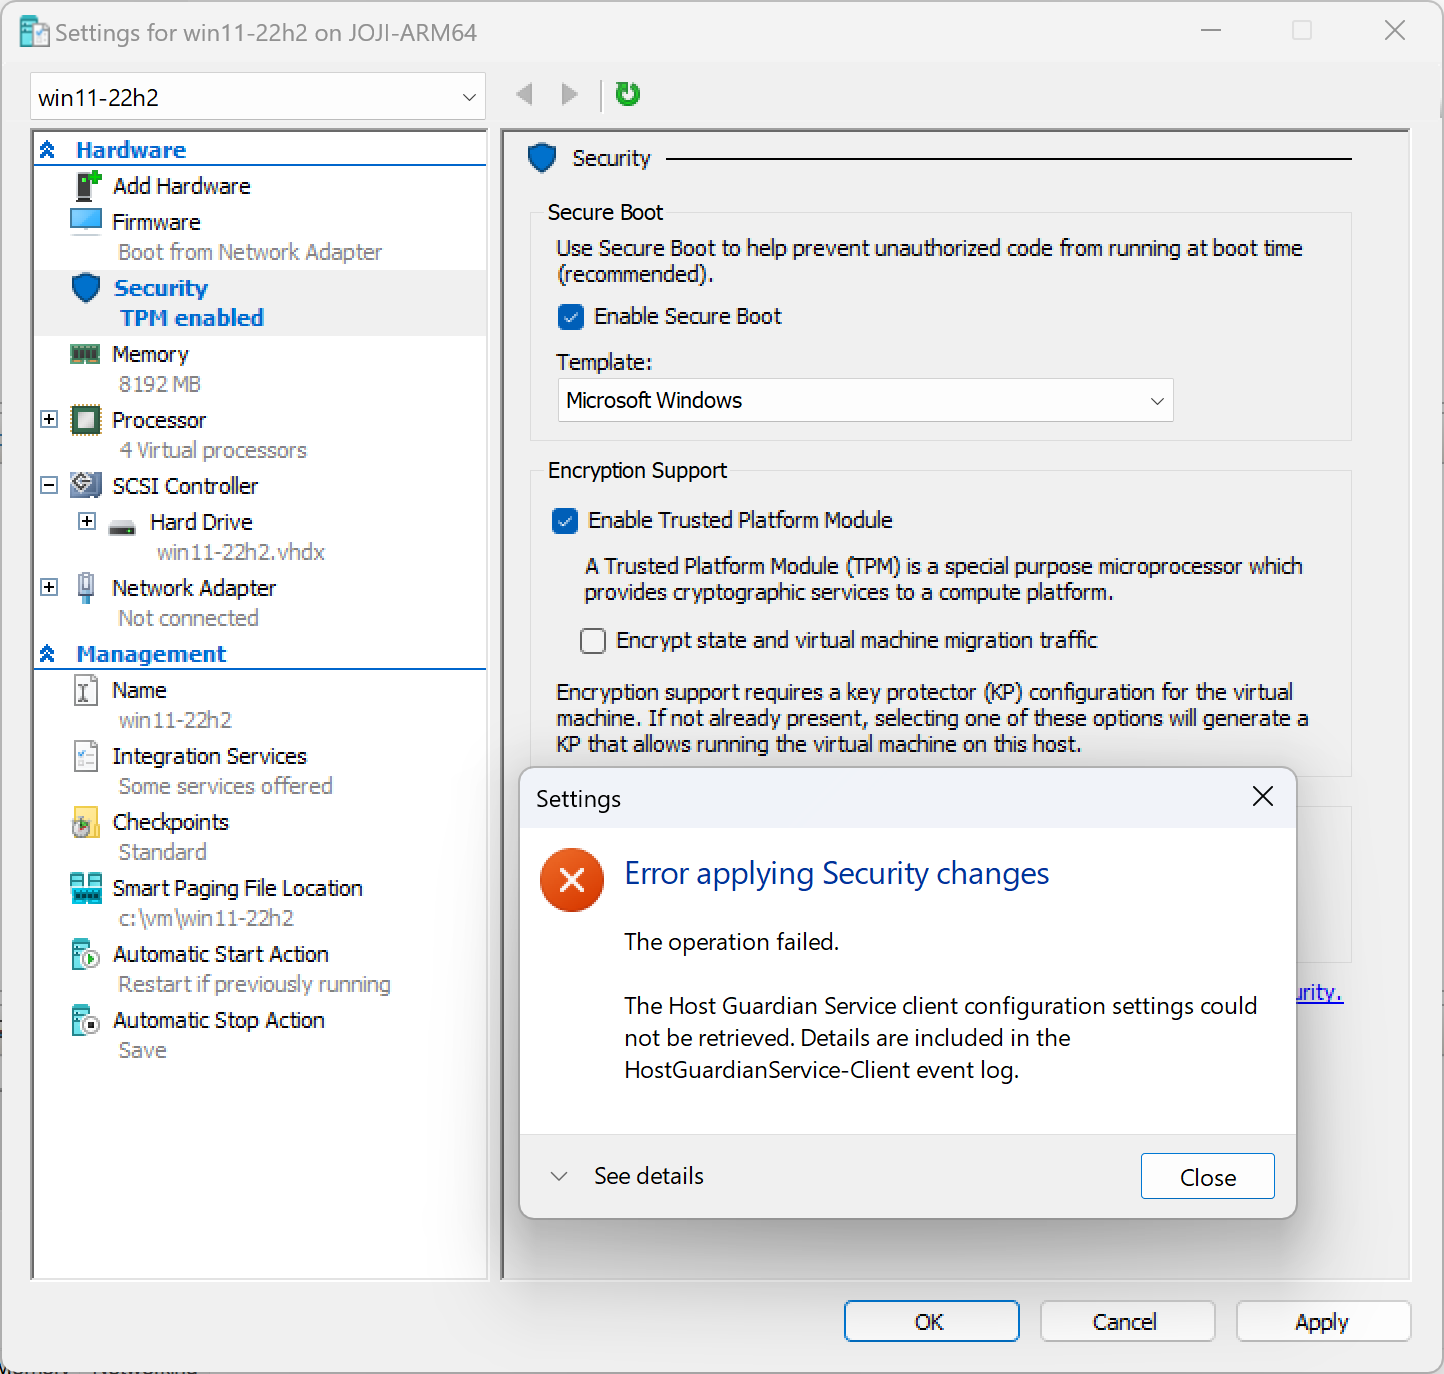

And there you have it! You've successfully installed Windows 11 ARM64 VM in Hyper-V. This method is a bit of a workaround due to the limitations of the ARM64 architecture on Hyper-V, but it gets the job done. Happy virtualizing!