通常情况下,在基于 Intel 的 PC 上从 ISO 安装 Windows 非常简单——创建一个可启动的 U 盘,安装操作系统即可。然而,在像 Surface Pro X 这样的 ARM 设备上安装 Windows 则完全是另一回事。这是因为标准的 ISO 文件不包含 ARM 设备所需的驱动程序。因此,你需要手动注入驱动程序并采取其他额外步骤来确保一切顺利工作。在本指南中,我将逐步讲解如何成功地在我的 Surface Pro X 上安装一个干净的 Windows 11 系统。
第 1 步:从 UUPDump 下载 Windows 11
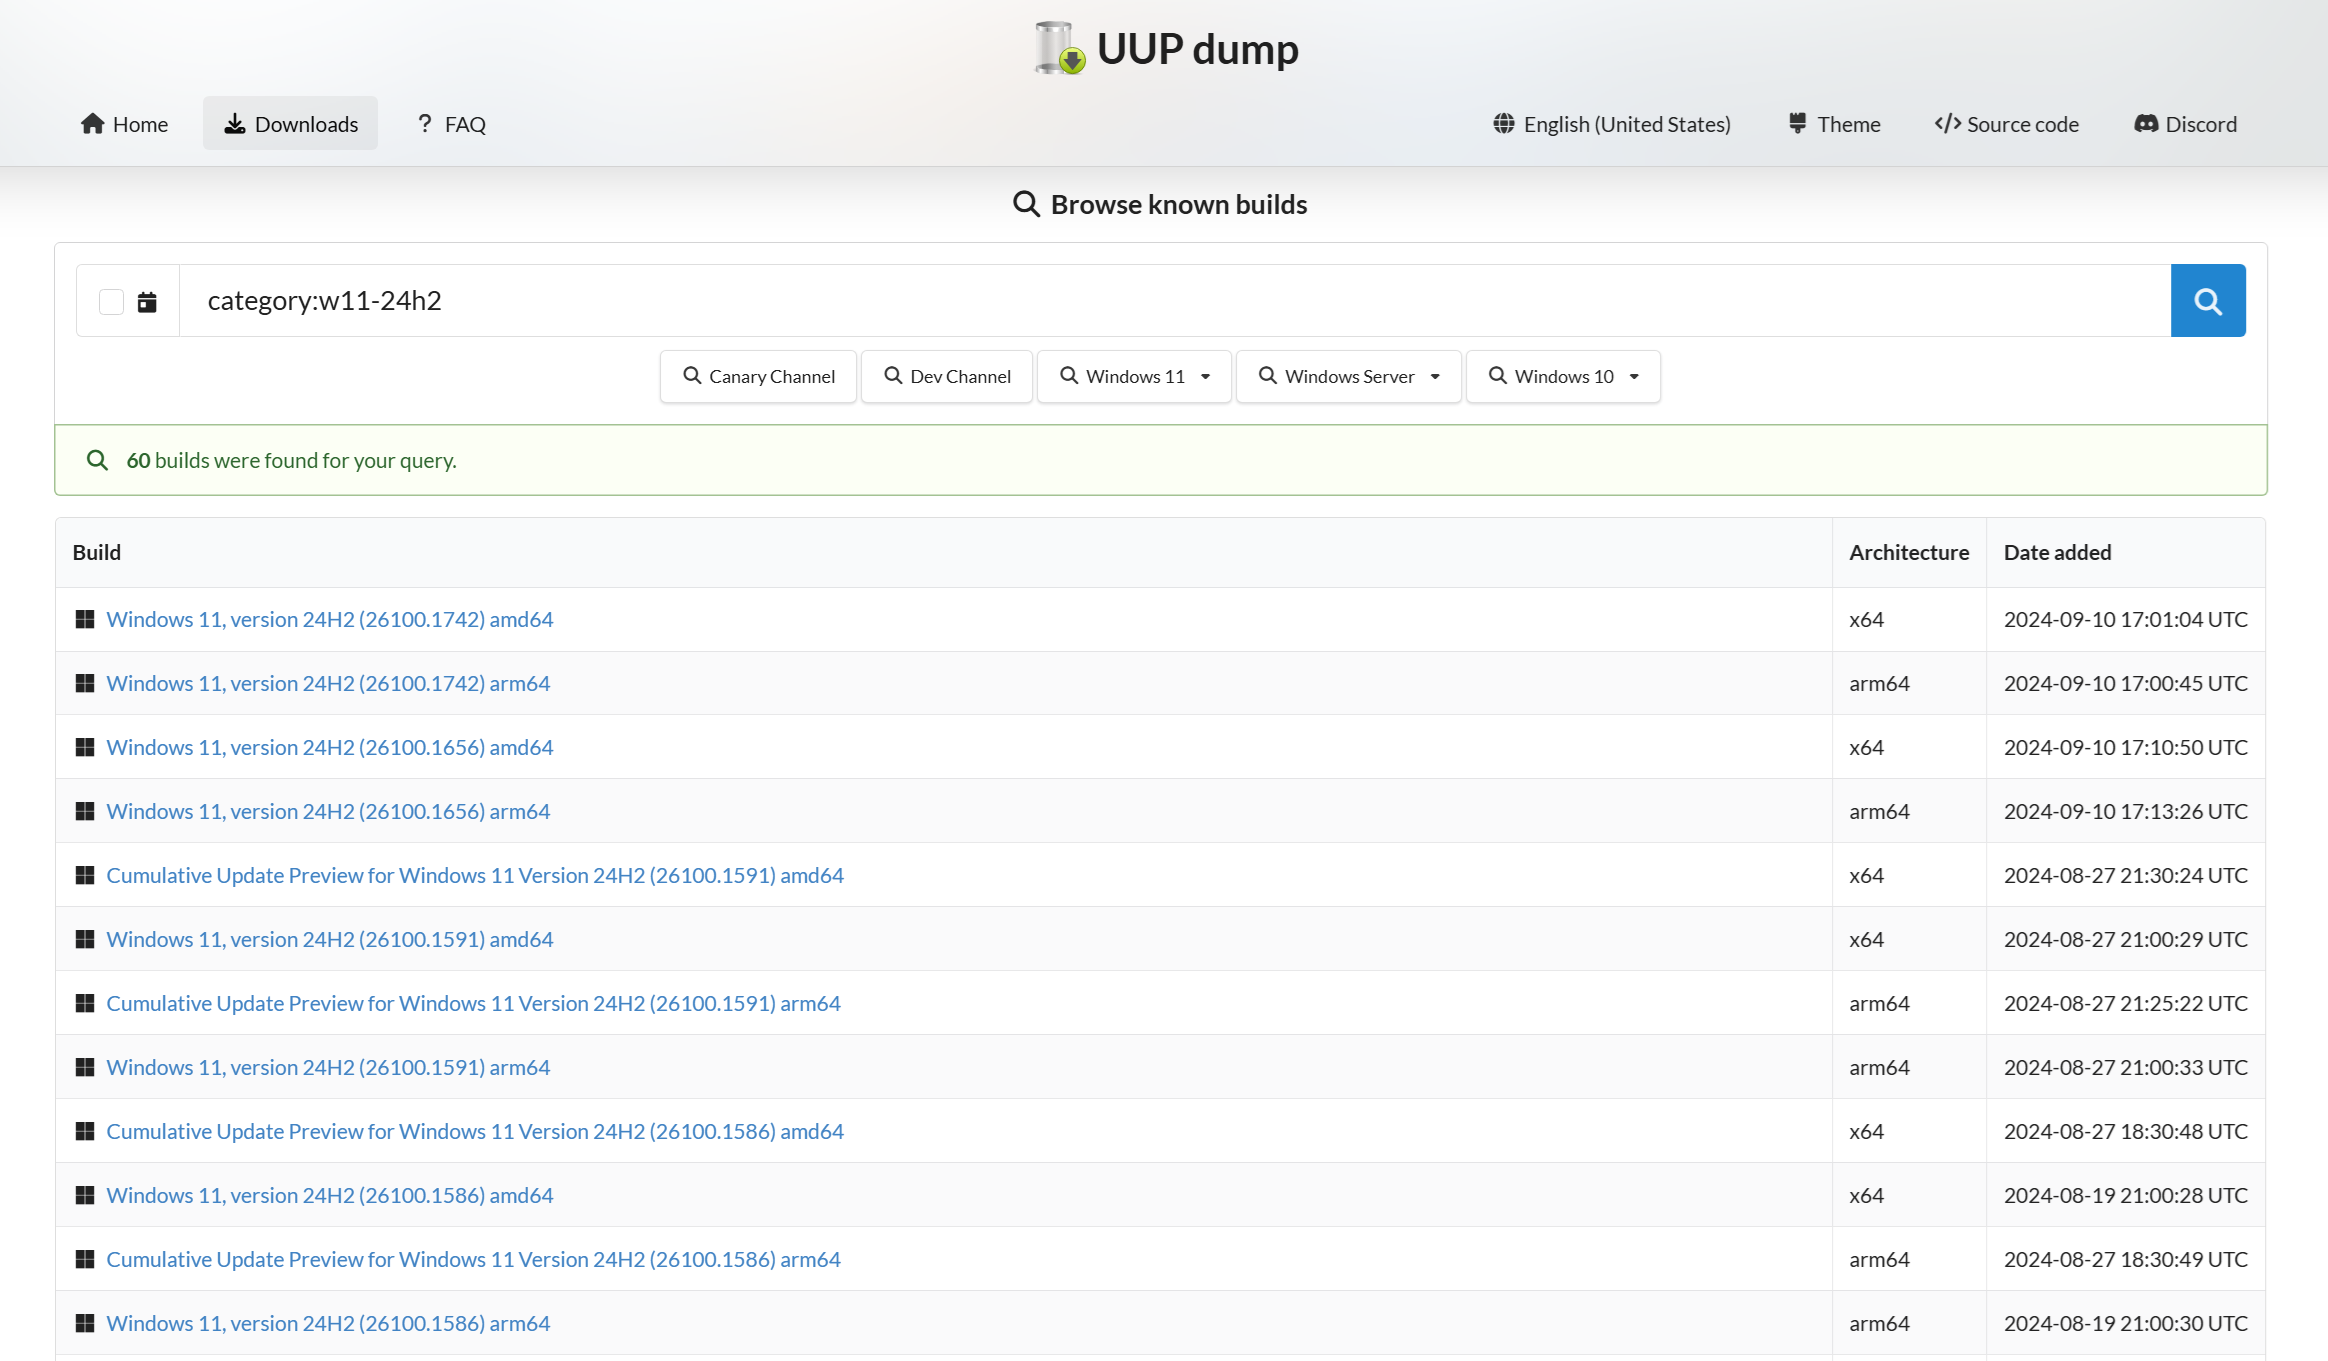
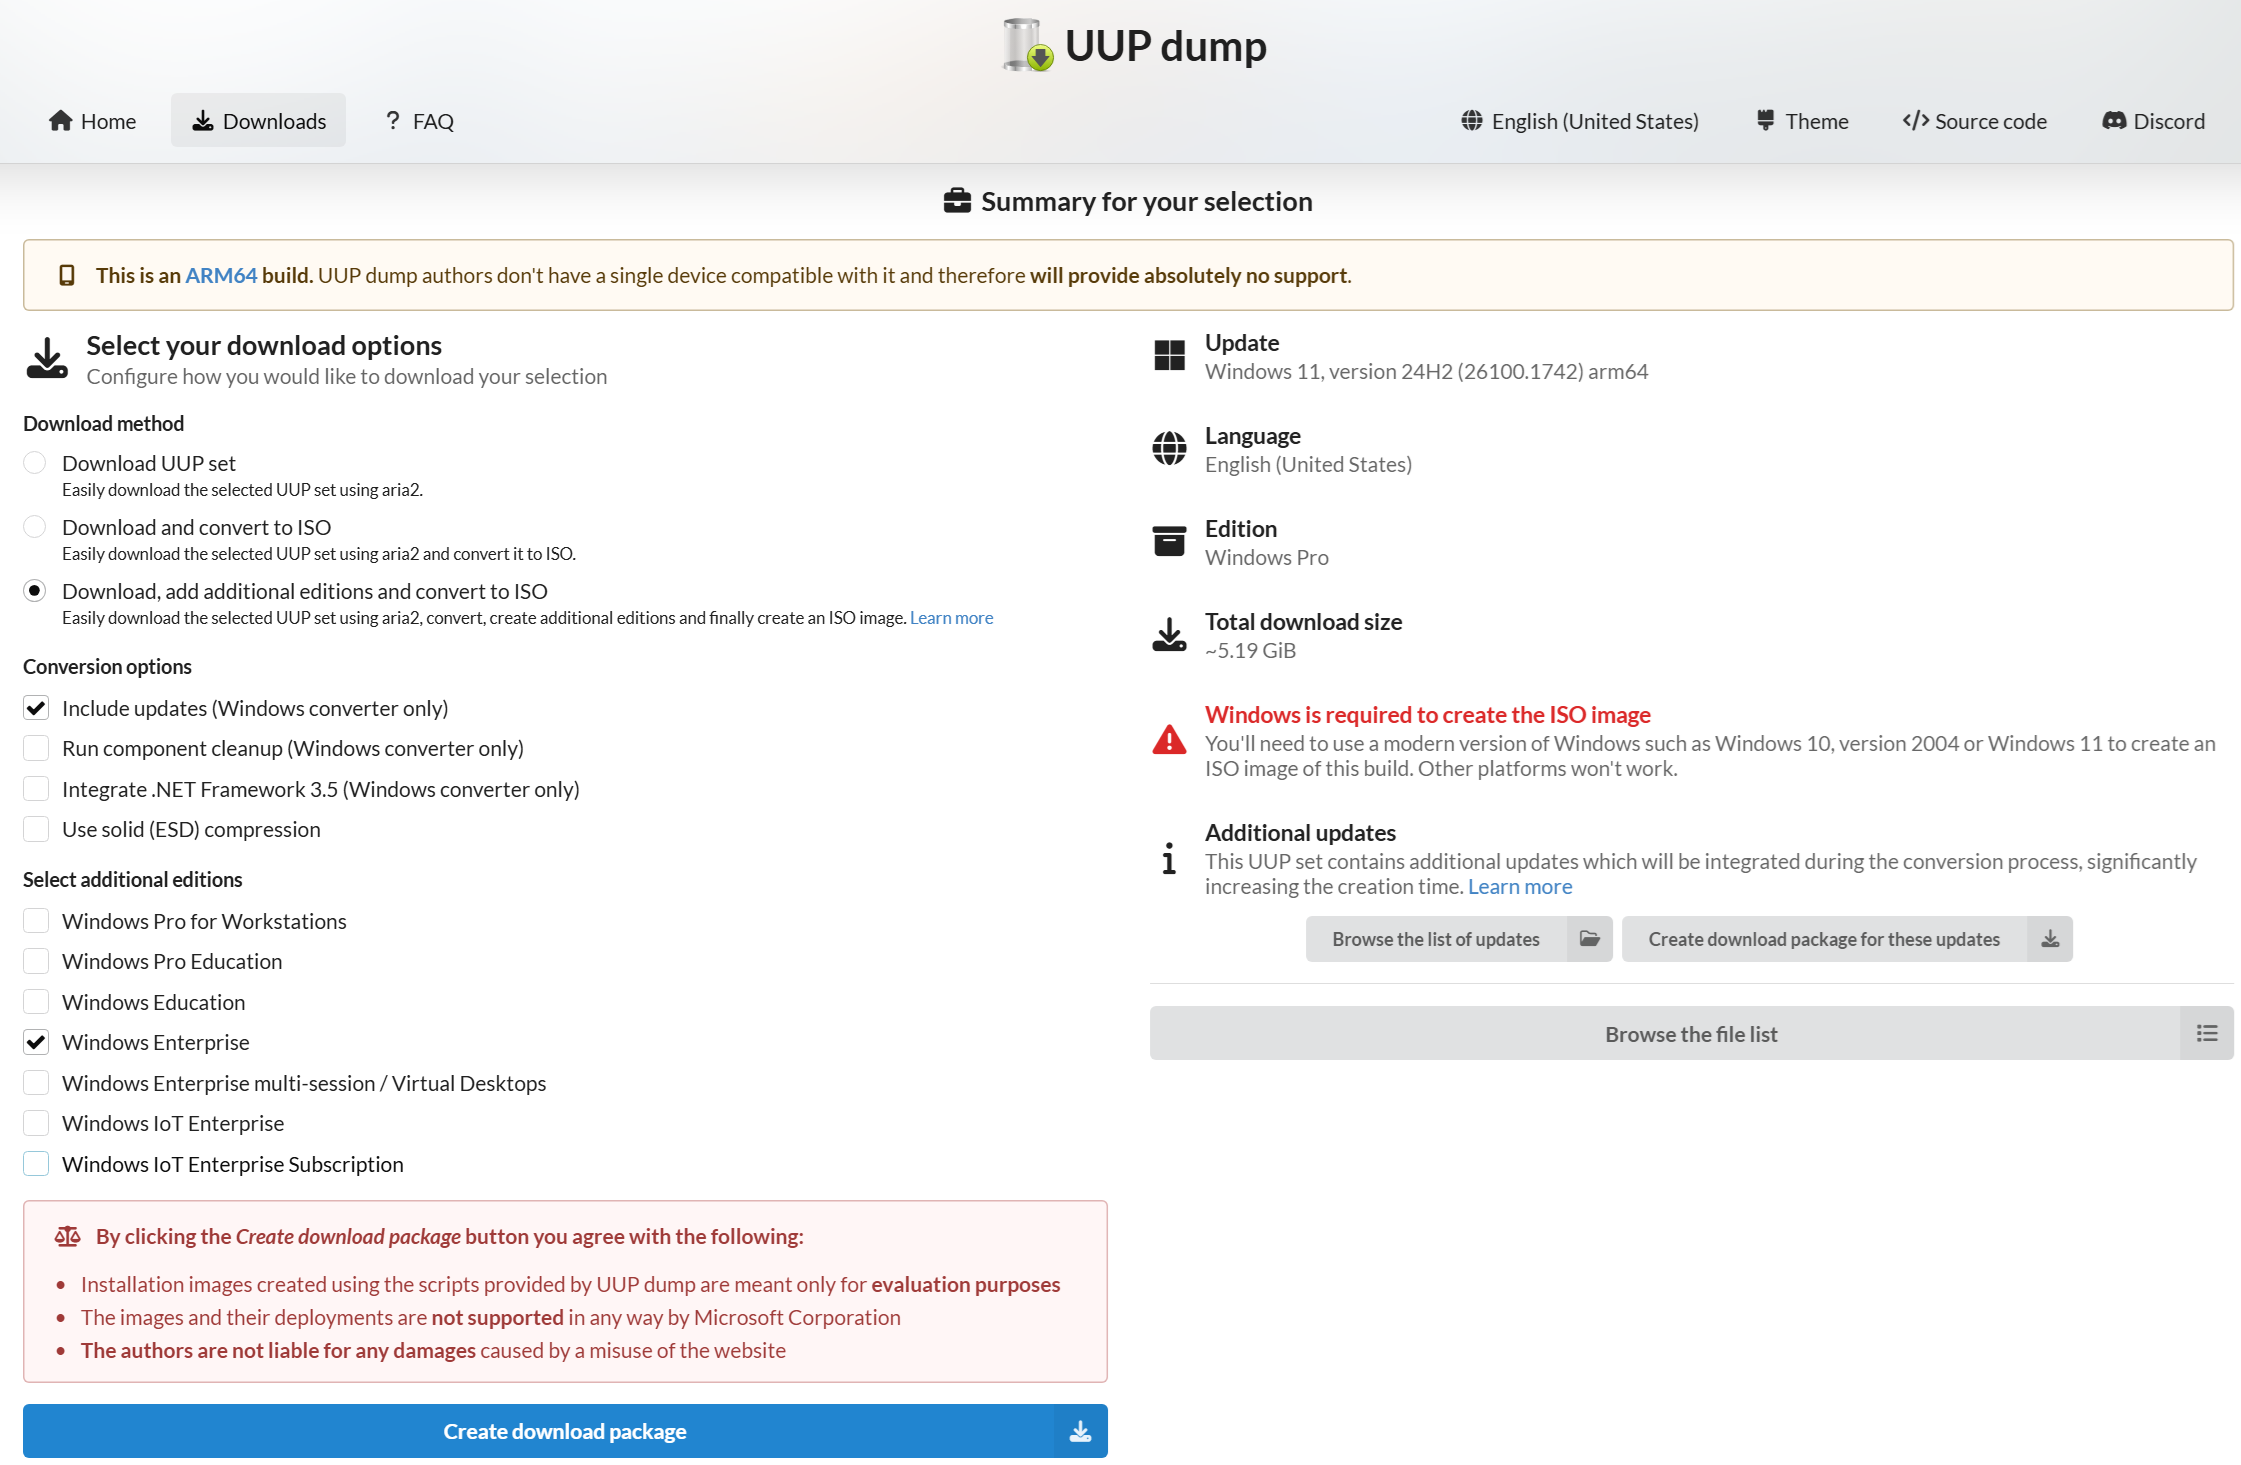
前往 UUPDump ,找到你想要安装的具体 Windows 11 版本。选择语言和你需要的版本(Windows Home、Pro、Education、Enterprise 等),然后点击 Create download package。
第 2 步:构建 ISO 文件
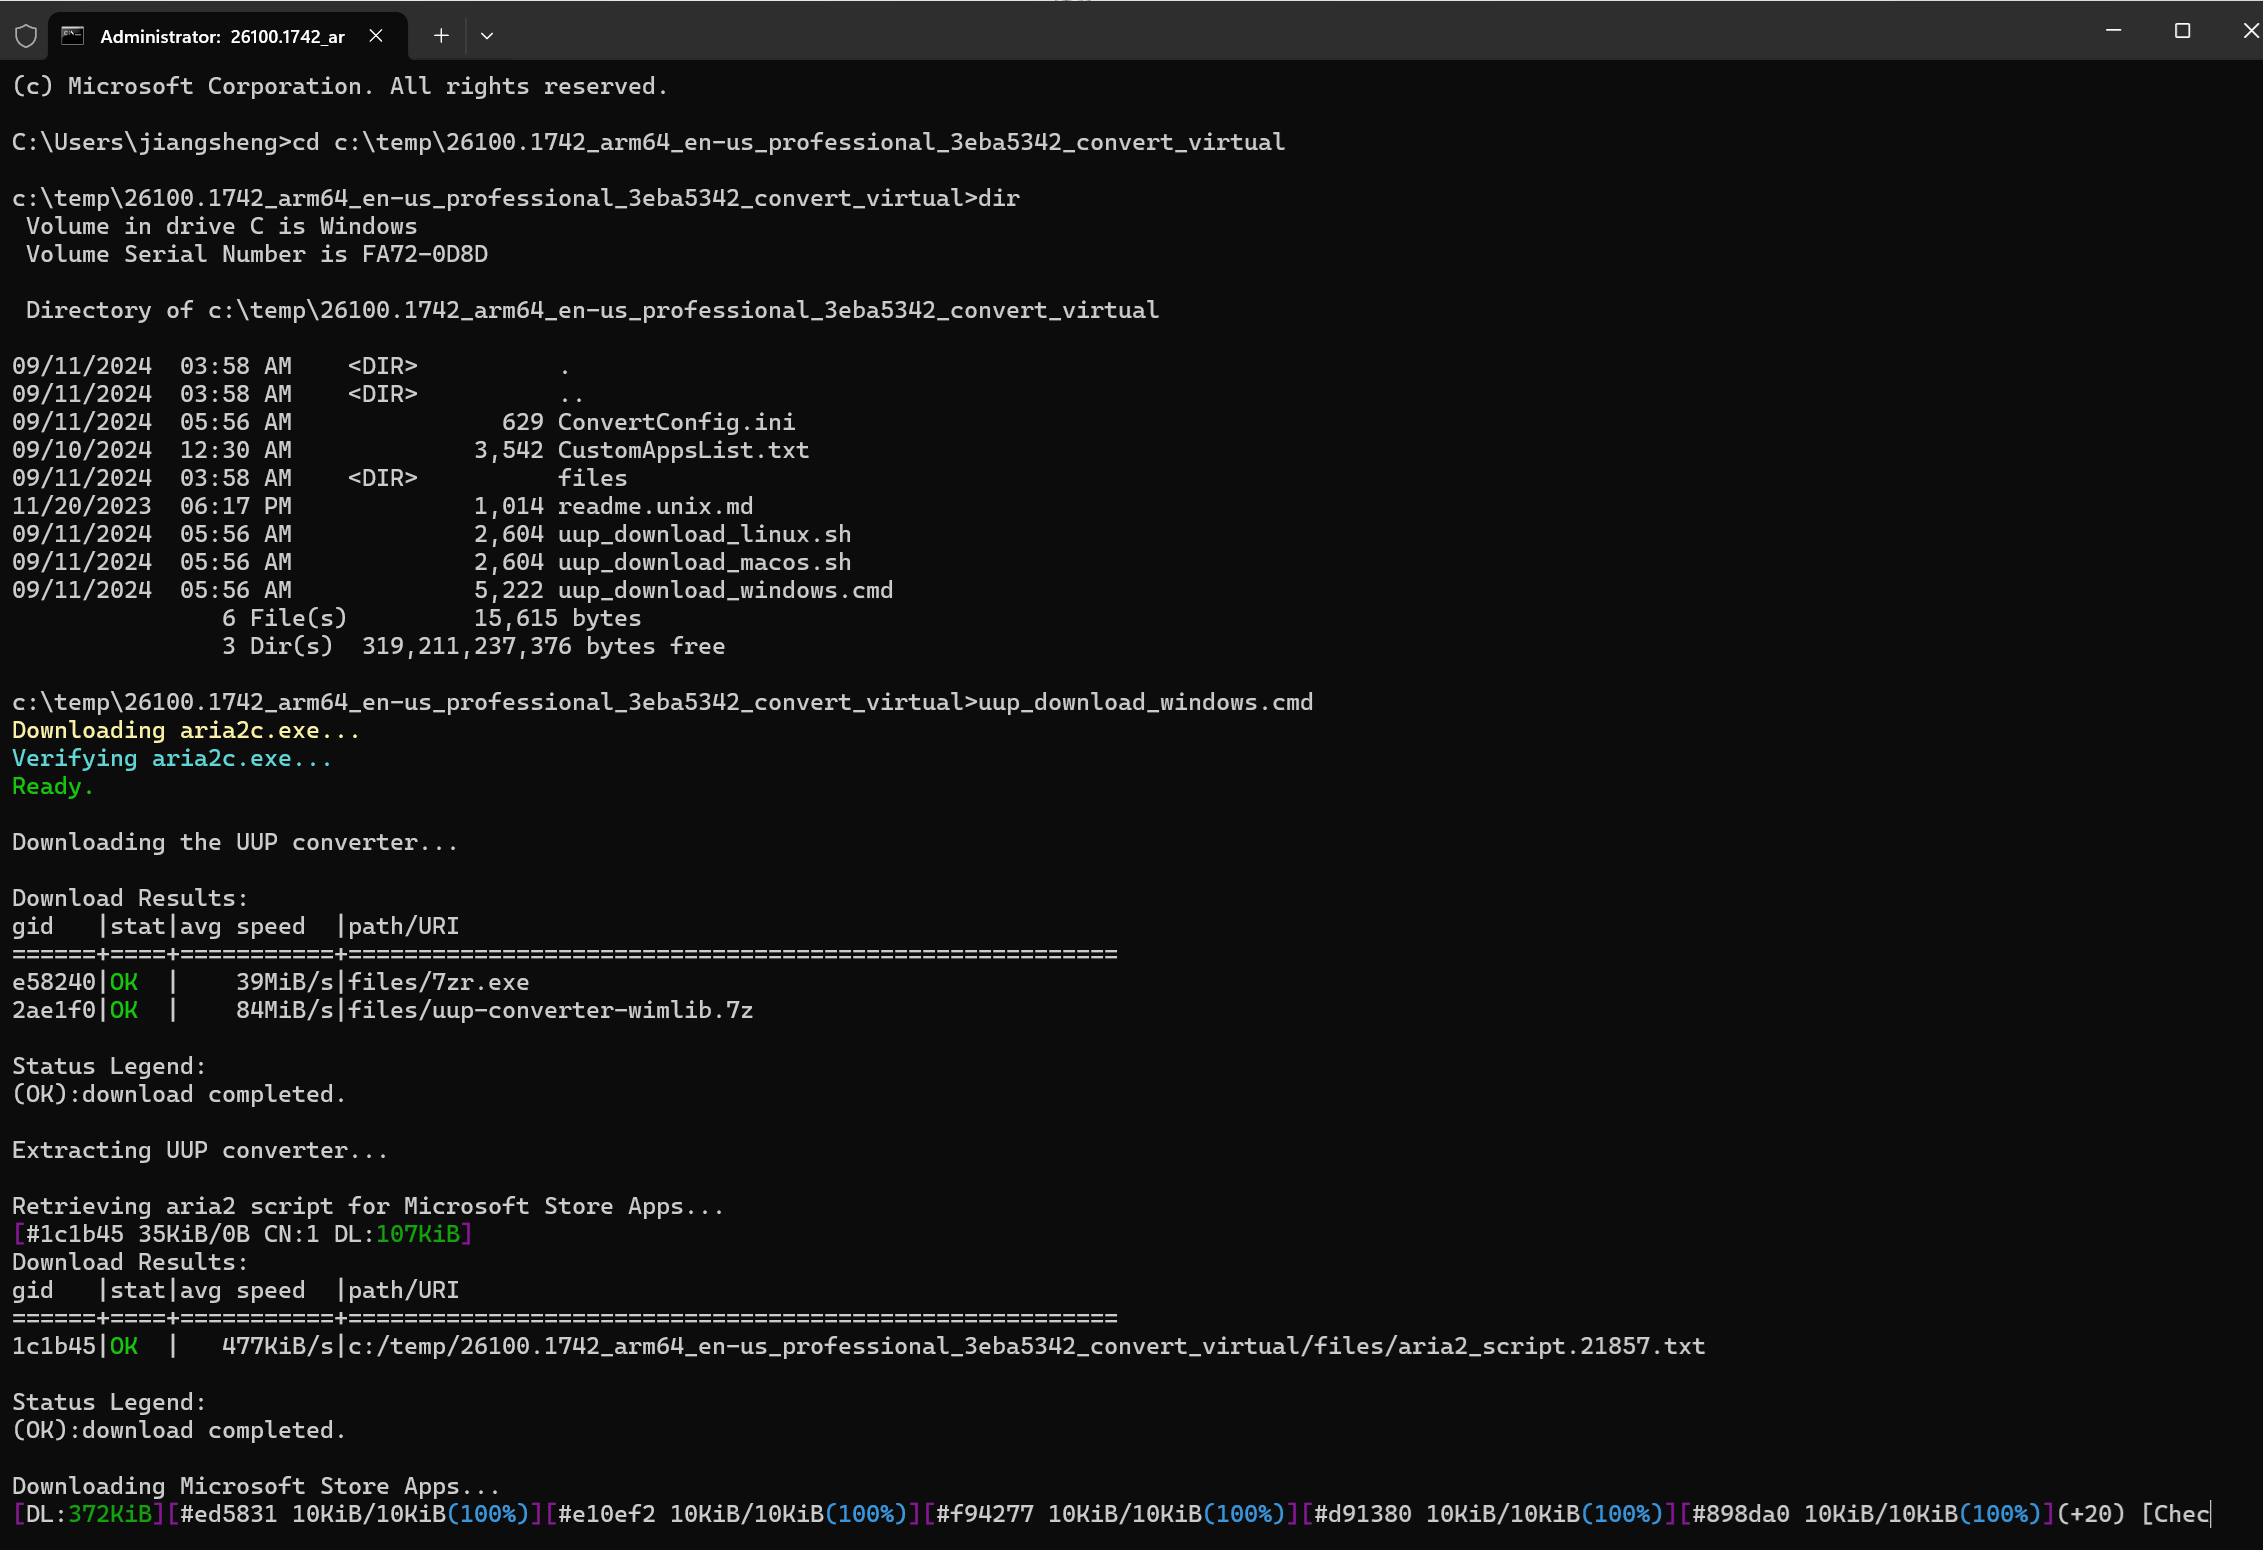
从 UUPDump 下载 ZIP 文件后,将其解压到一个文件夹中。以管理员权限打开命令提示符,导航到解压目录,并运行脚本 uup_download_windows.cmd,开始下载所需文件并创建 ISO 文件。根据你的网络速度和计算机性能,这个过程可能需要 30 分钟到几个小时不等。
第 3 步:下载 Surface 恢复映像
在等待 ISO 创建时,访问 Surface 恢复映像下载,下载与你的 Surface 型号对应的恢复映像。
第 4 步:下载最新的 Surface 驱动程序
接下来,前往 Surface Qualcomm 驱动程序 GitHub 页面,下载适用于你的 Surface 型号的最新 ARM 驱动程序。例如,在撰写本文时,我的 Surface Pro X(配备 SQ2 处理器)的最新驱动位于此文件夹下:Surface/8180_CAR/200.0.38.0。你可以使用 GitHub 目录下载工具 来只下载该特定文件夹的内容。
第 5 步:提取 CAB 驱动程序
下载包含超过 100 个 .cab 驱动文件的 ZIP 文件后,将其解压到一个文件夹,比如 C:\temp\arm-drivers。接下来,你需要将每个 CAB 文件解压到 C:\temp\extracted-drivers。你可以使用以下批处理脚本轻松完成此操作。将脚本保存为 extract.bat 并运行它。如果你的目录路径不同,请自行修改路径。
@echo off
set source_dir=C:\temp\arm-drivers
set dest_dir=c:\temp\extracted-drivers

if not exist "%dest_dir%" (
    mkdir "%dest_dir%"
)

for %%f in ("%source_dir%\*.cab") do (
    echo Extracting %%f to %dest_dir%
    expand "%%f" -F:* "%dest_dir%"
)

echo All done
pause
第 6 步:创建可启动 U 盘
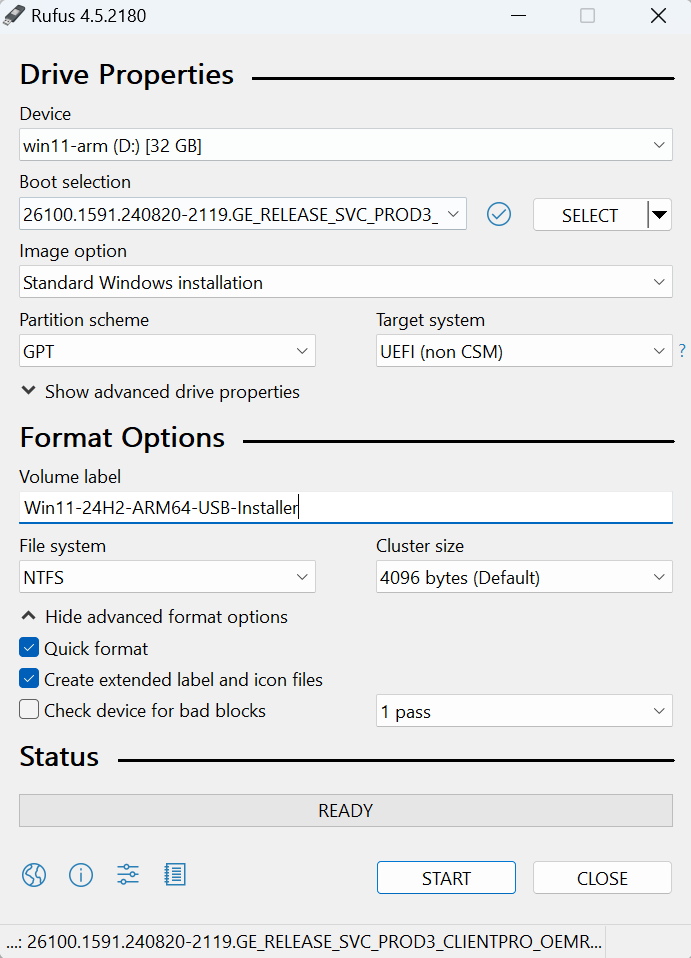
当 ISO 创建完毕后,插入 U 盘并使用 Rufus 将 ISO 刻录到 U 盘。
第 7 步:用恢复映像的 boot.wim 替换 U 盘中的 boot.wim
将你之前下载的 Surface 恢复映像 ZIP 文件解压,使用恢复映像中的 sources\boot.wim 文件替换 U 盘中的 sources\boot.wim 文件(假设你的 U 盘映射为 D 盘,那么路径为 D:\sources\boot.wim)。
第 8 步:下载并复制所需脚本
从 https://go.microsoft.com/fwlink/?linkid=872894 下载必要的部署脚本。我也将其备份在这里以防链接失效。解压 ZIP 文件并将 ApplyImage.bat 和 CreatePartitions-UEFI.txt 从 Deployment 文件夹中复制到 U 盘的根目录(或复制所有脚本以支持更多设备)。
第 9 步:将提取的驱动程序复制到 U 盘
将提取的驱动程序文件夹 C:\temp\extracted-drivers 复制到你的 U 盘。
第 10 步:进入 Surface UEFI 并禁用安全启动
关闭你的 Surface Pro X。按住 音量增大 键并按下 电源 键,启动设备进入 UEFI 设置。禁用 Secure Boot(安全启动) 并将 USB 启动优先级设置为最高。
第 11 步:从 U 盘启动并进入命令提示符
插入 U 盘并从中启动。选择语言,选择 Troubleshoot,然后选择 Command Prompt(命令提示符)。
第 12 步:识别 U 盘盘符
在命令提示符下,输入 diskpart 进入 DiskPart,然后输入 list volume 列出所有卷。
X:\Windows\System32>diskpart

Microsoft DiskPart version 10.0.22621.1

Copyright (C) Microsoft Corporation.
On computer: MININT-5VEB9S9

DISKPART> list volume

  Volume ###  Ltr  Label        Fs     Type        Size     Status     Info
  ----------  ---  -----------  -----  ----------  -------  ---------  --------
  Volume 0     C   Windows      NTFS   Partition    476 GB  Healthy
  Volume 1         SYSTEM       FAT32  Partition    100 MB  Healthy    Hidden
  Volume 2         Recovery     NTFS   Partition    500 MB  Healthy    Hidden
  Volume 3     D   Win11-24H2-  NTFS   Removable     28 GB  Healthy
  Volume 4     E   UEFI_NTFS    FAT    Removable   1039 KB  Healthy

DISKPART> exit

Leaving DiskPart...
记下分配给你 U 盘的驱动器号(例如 D:),然后输入 exit 退出 DiskPart。
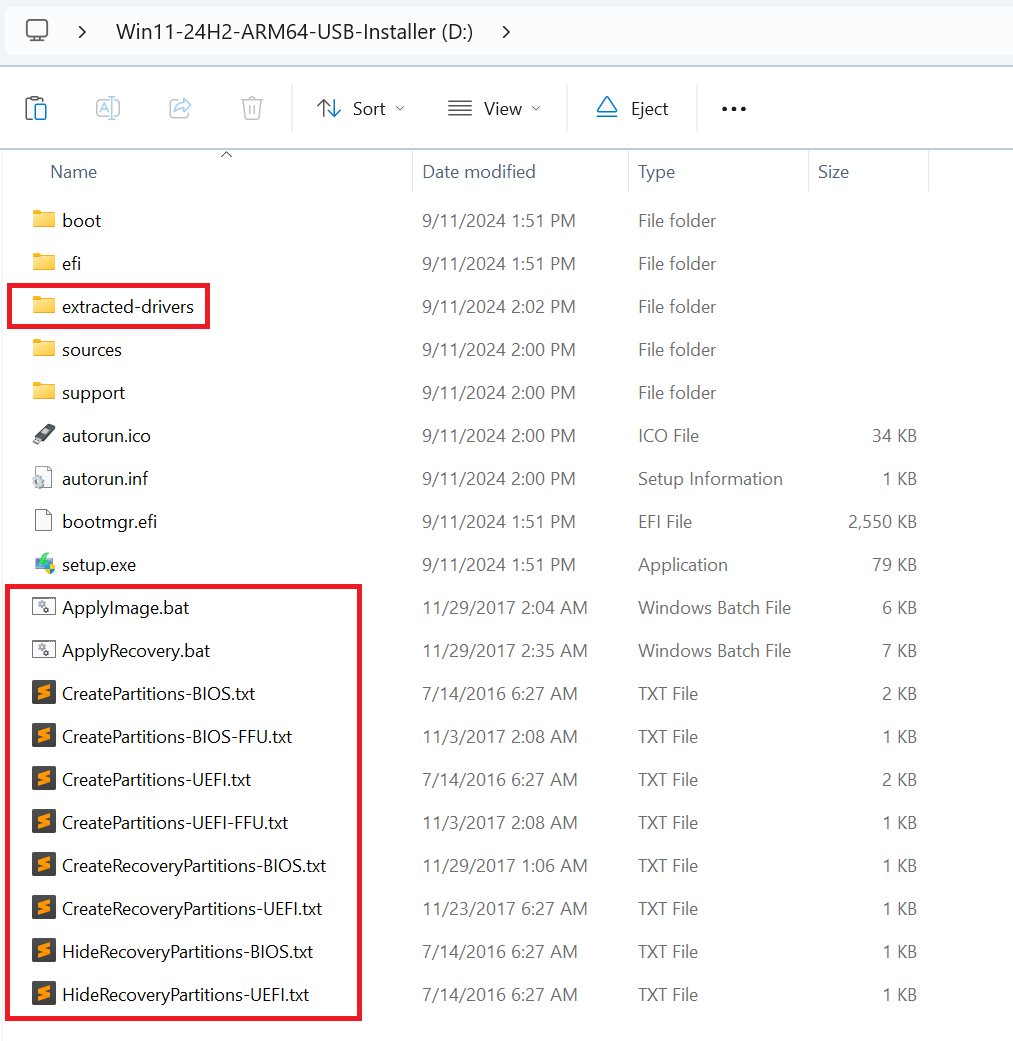
通过输入 D: 切换到 U 盘,使用 dir 确认可以看到文件。你应该能看到 ApplyImage.bat。
D:\>dir
 Volume in drive D is Win11-24H2-ARM64-USB-Installer
 Volume Serial Number is 109F-D2C7

 Directory of D:\

11/28/2017  10:04 AM             6,044 ApplyImage.bat
11/28/2017  10:35 AM             6,985 ApplyRecovery.bat
09/10/2024  10:00 PM            34,494 autorun.ico
09/10/2024  10:00 PM               246 autorun.inf
09/10/2024  10:07 PM    <DIR>          boot
09/10/2024  09:51 PM         2,611,016 bootmgr.efi
11/02/2017  10:08 AM               667 CreatePartitions-BIOS-FFU.txt
07/13/2016  02:27 PM             1,036 CreatePartitions-BIOS.txt
11/02/2017  10:08 AM               863 CreatePartitions-UEFI-FFU.txt
07/13/2016  02:27 PM             1,305 CreatePartitions-UEFI.txt
11/28/2017  09:06 AM               576 CreateRecoveryPartitions-BIOS.txt
11/22/2017  02:27 PM               631 CreateRecoveryPartitions-UEFI.txt
09/10/2024  09:51 PM    <DIR>          efi
09/10/2024  10:02 PM    <DIR>          extracted-drivers
07/13/2016  02:27 PM               118 HideRecoveryPartitions-BIOS.txt
07/13/2016  02:27 PM               187 HideRecoveryPartitions-UEFI.txt
09/10/2024  09:51 PM            80,312 setup.exe
09/10/2024  10:00 PM    <DIR>          sources
09/10/2024  10:00 PM    <DIR>          support
              14 File(s)      2,744,480 bytes
               5 Dir(s)  23,145,111,552 bytes free
第 13 步:确定正确的版本索引
ApplyImage.bat 脚本默认会安装 WIM 文件中的 Index 1 版本。如果你的 ISO 中包含多个版本(例如,Windows 11 Pro、Windows 11 Enterprise),并且你想安装不同的版本,你需要修改脚本以指定正确的索引。
要找到你想要安装的版本的索引号,请在命令提示符中运行以下命令:
dism /get-wiminfo /wimfile:D:\sources\install.wim
这将显示可用版本的列表及其对应的索引号。例如:
Deployment Image Servicing and Management tool
Version: 10.0.22621.1

Details for image : D:\sources\install.wim

Index : 1
Name : Windows 11 Pro
Description : Windows 11 Pro
Size : 25,809,399,717 bytes

Index : 2
Name : Windows 11 Enterprise
Description : Windows 11 Enterprise
Size : 25,811,284,070 bytes

The operation completed successfully.
如果你想安装 Windows 11 Enterprise,其索引为 Index:2,你需要编辑 ApplyImage.bat 脚本。
在命令提示符中运行以下命令来用记事本打开脚本:
notepad ApplyImage.bat
然后找到脚本中第 82 至 85 行的 /Index:1,将 1 改为 2(或你想安装的版本的索引号)。这样可以确保安装正确的版本。如果你只想安装 Index 1 的版本,可以跳过这一步。
保存文件后,继续下一步。
第 14 步:开始安装 Windows
要开始安装 Windows,运行以下命令:
D:\ApplyImage.bat D:\sources\install.wim
该脚本将自动通过 diskpart 命令处理磁盘分区过程。它将创建并分配以下必要的分区:
W:: Windows 系统分区S:: 系统(启动)分区R:: 恢复分区
DiskPart successfully assigned the attributes to the selected GPT partition.

  Volume ###  Ltr  Label        Fs     Type        Size     Status     Info
  ----------  ---  -----------  -----  ----------  -------  ---------  --------
  Volume 0     W   Windows      NTFS   Partition    476 GB  Healthy
  Volume 1     S   SYSTEM       FAT32  Partition    100 MB  Healthy    Hidden
* Volume 2     R   Recovery     NTFS   Partition    500 MB  Healthy    Hidden
  Volume 3     D   Win11-24H2-  NTFS   Removable     28 GB  Healthy
  Volume 4     E   UEFI_NTFS    FAT    Removable   1039 KB  Healthy

Leaving DiskPart...
在脚本运行过程中,它会询问你几个问题:
- Do you want to create a Recovery partition?(是否创建恢复分区?) — 选择 Y 创建恢复分区。
- Erase all data and continue?(是否删除所有数据并继续?) — 选择 Y 删除现有数据并继续安装。
- Deploy as Compact OS?(是否部署为紧凑型操作系统?) — 选择 N,除非你特别想要紧凑型安装。
- Does this image include Extended Attributes?(此映像是否包含扩展属性?) — 同样选择 N。
脚本将负责将 Windows 映像应用到 W 分区,并重新配置磁盘分区以优化 Surface 设备的设置。
第 15 步:安装 Surface 驱动程序
安装完成后,运行命令 dism /image:W: /add-driver /driver:D:\extracted-drivers /recurse 将 Surface 驱动程序添加到 Windows 中:
D:\>dism /image:W: /add-driver /driver:D:\extracted-drivers /recurse

Deployment Image Servicing and Management tool
Version: 10.0.22621.1

Image Version: 10.0.26100.1742

Searching for driver packages to install...
Found 133 driver package(s) to install.
Installing 1 of 133 - D:\extracted-drivers\dax3_ext_qc_dolbyatmos_dolbyaccessoem.inf: The driver package was successfully installed.
Installing 2 of 133 - D:\extracted-drivers\dax3_qc_ext_bt.inf: The driver package was successfully installed.
Installing 3 of 133 - D:\extracted-drivers\dax3_swc_aposvc_arm64.inf: The driver package was successfully installed.
Installing 4 of 133 - D:\extracted-drivers\dax3_swc_hsa_arm64.inf: The driver package was successfully installed.
Installing 5 of 133 - D:\extracted-drivers\HalExtQCWdogTimer8180.inf: The driver package was successfully installed.
...
...
Installing 132 of 133 - D:\extracted-drivers\SurfaceVirtualFunctionEnum.inf: The driver package was successfully installed.
Installing 133 of 133 - D:\extracted-drivers\WbfUsbDriver.inf: The driver package was successfully installed.
The operation completed successfully.
第 16 步:重启并完成安装
拔掉 U 盘,重启你的 Surface Pro X。你现在应该有一个带有所有必要驱动程序的干净 Windows 11。